You’ve spent hours carefully crafting your embroidery piece, but have you considered the vital step of tying off your stitches? It’s not just a regular knot; it’s about making sure your work is secure, durable, and looks professional. Different techniques offer unique advantages, so wouldn’t you want to explore which method might best enhance your embroidery? It’s a small detail that can make a big difference.
Key Takeaways
- Use techniques such as weaving, the loop and knot method, or tying ends together for securing embroidery stitches.
- Always flip the fabric to the backside before tying off for a tidy finish.
- Make sure to leave a longer thread end before you start embroidering, as it will be necessary for tying off later on.
- For a more professional finish, use a thinner, matching color sewing thread to tie off.
- Ensure knots are secure and trim any excess thread neatly to maintain a smooth finish.
Tie off Embroidery Stitches with a Weave
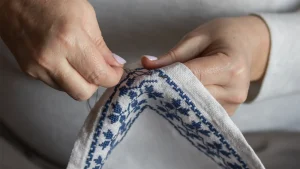
Step 1: Turn to the reverse of the embroidery fabric.
 Start by working on the back side of the embroidery fabric. This is where you will tie off the stitches.
Step 2: Find stitches which are close to the thread.
 Scanning your embroidery’s reverse side, identify stitches close to your thread that can serve as secure anchor points for weaving. These stitches are vital to properly secure the thread and prevent it from loosening or unraveling over time.
Step 3: Pass the needle over the stitches several times without piercing the fabric.
 To securely tie off your embroidery thread, weave your needle over the anchor stitches without piercing the fabric. Carefully pass the needle over and under the stitches, creating a weave that firmly holds the thread in place.
Tie off Embroidery Stitches with Loop and Knot

Now, let’s follow the method of tying off embroidery stitches with a loop and knot.
Step 1: Turn to the back of your embroidery fabric.
Flip your embroidery fabric to reveal the backside, the ideal location for securely tying off your stitches.
Step 2: Locate the stitches that are close to the thread.
Once the back of your embroidery fabric is secure, your next step is to find the stitches near the thread you want to tie off. You’re not just randomly choosing a stitch; you’re strategically identifying those adjacent to your thread.
Step 3: Pass the needle through the stitch and create a loop.
To make a secure tie-off, start by passing the needle under a stitch to form a loop for the knot foundation. This important step in hand embroidery keeps your thread in place, preserving the look of your work.
Step 4: Bring the needle through the loop to form a knot.
After creating the loop, bring the needle up through it to form a secure knot in the embroidery thread. Once your needle has been passed through, carefully pull it to tighten the loop. Make sure you’re not pulling too hard, as this could distort the stitch or the fabric.
Step 5: Repeat the above steps to secure the thread.
After you have successfully tied your knot, don’t stop there. It’s time to repeat the process and make sure each stitch is securely anchored, so that your embroidery project stays together nicely.
You’ll want to keep repeating the loop and knot method to secure the thread. Remember, consistency is key. Each stitch must be tied off properly to prevent unraveling.
Tie off Embroidery Stitches by Tying Ends Together
Now, let’s focus on tying off embroidery stitches by tying the ends together.
Step 1: Leave a long thread end before starting your hand embroidery.
At the beginning of your embroidery project, leave a long thread end to securely fasten your stitches.
To prevent stitches from coming undone, leave a generous thread end when sewing. This will help anchor the stitches securely. The art of embroidery requires attention to such details.
Step 2: Bring the end tail close to the long thread left out when you finish embroidery.
After you finish stitching, it’s important to trim the end tail of the thread and bring it close to the long thread you left at the beginning. Carefully pull the thread through your last stitch, ensuring it’s neither too loose nor too tight. The goal is to have both thread ends overlap, setting the stage for a secure knot.
Step 3: Tie off the two ends together.
Hold the ends firmly and tie a tight knot, ensuring it’s as close to the fabric as possible. This way you’ll secure the stitches effectively.
After the knot is tied, trim any excess thread closely to it. Don’t rush this process – a neat finish is crucial for the overall aesthetic of your embroidery.
Tie off Embroidery Stitches with Sewing Thread
Now, let’s focus on how to tie off embroidery stitches using sewing thread.
Step 1: Prepare a thinner sewing thread.
Use a thinner sewing thread for tying off embroidery stitches. It creates a smoother and more discreet finish. The thin thread’s slim profile allows it to pass through the stitches smoothly without changing the texture of your project. Using a matching thread color will blend the tie seamlessly into your work, making your project look more professional.
Step 2: Take the sewing thread across the fabric and wrap around the thread you want to secure.
Now that you have your thinner sewing thread ready, you can skillfully pass it across the fabric and wrap it around the embroidery thread to secure it.
The sewing thread now acts as a binder, keeping the embroidery thread in place and preventing it from unraveling or coming loose. As you navigate this process, remember that the tighter you wrap, the stronger the knot.
Conclusion
In wrapping up, tying off your embroidery stitches neatly and securely is key to a professional result. Choose your preferred method for finishing the thread and remember to trim any extra for a neat look.
With patience and attention to detail, you’ll master these techniques and ensure your embroidery projects are durable and look top-notch. Keep practicing – your embroidery skills will only get better.