How to Hand Embroider a Shirt: a Tutorial for Embroidery T-shirt
You’ve decided to try shirt embroidery, which is less challenging than running a marathon in high heels. Or you just want to embroider a lovely flower on your t-shirts. It’s an art that demands patience, precision, and creativity.
You’ll need some basic tools: a shirt, an embroidery hoop, scissors, and stabilizers. But wait! What’s the right method to hoop your shirt, or mark the center of your design? And how on earth do you deal with those pesky loose threads?
Well, hold your horses, we’re just getting started. Stick around, there’s a lot more to this fascinating world of needle and thread.
Key Takeaways
- Proper preparation and needle selection are crucial for achieving flawless stitching and preventing fabric distortion.
- The quality and color of the thread significantly affect the durability, color vibrancy, and overall aesthetics of the embroidery design.
- The use of an embroidery hoop and water-soluble stabilizer ensures fabric stability, precision, and clean designs during the embroidery process.
- Embroidering a shirt involves preparing the fabric, learning to use the hoop, stitching the design, and finishing for a flawless result.
Supplies You Need
Before you can bring your design to life, you’ll need to gather your tools. You will get a t-shirt, a needle, and thread. You will also get an embroidery hoop to keep your fabric tight and a water-soluble stabilizer to maintain your design’s integrity. Ensuring you have these supplies on hand will pave the way for a successful embroidery project.
T-shirt
Preparation is key. Start by washing and ironing your shirt for a smooth surface perfect for embroidery stitches. Mark the center of your design on the shirt, ensuring precise placement.
Needle
The next important thing you need is a sharp embroidery needle, to guarantee perfect stitching. The needle size should align with your fabric weight. It ensures smooth embroidery and prevents puckering. The type of needle is important. Use a ballpoint needle for knits and a sharp needle for woven fabrics. Using the right needle for embroidery ensures a smooth process and prevents thread breakage and design distortion.
Thread
Choosing the right thread is very important for your embroidery. It affects the strength, color, and overall appearance of your designs. High-quality embroidery floss, particularly polyester, is your best bet. Known for its strength and resistance to fading and shrinking, polyester thread ensures your handiwork withstands the test of time.
Thread weight also plays a significant role. The weight you select directly impacts the stitch coverage and texture of your design. Choose colors carefully to make sure they match the fabric and design of the shirt.
Embroidery Hoop
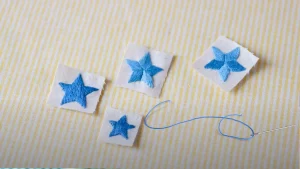
It’s the embroidery hoop that truly helps bring your design to life. This circular tool holds your shirt taut, ensuring the fabric remains stable and flat. The embroidery hoop plays a crucial role in maintaining proper tension and preventing fabric puckering. It enables the creation of precise and professional-looking designs. You’ll need to choose the right size hoop, ideally matching your design’s dimensions. You’ll first secure a stabilizer to the shirt’s back, then carefully position the shirt in the hoop, ensuring it’s taut. This helps avoid wrinkles and ensures even stitching.
Water Soluble Stabilizer
You need a water-soluble stabilizer in your embroidery toolkit. This supply dissolves in water after you embroider, leaving your shirt fabric clean. This wonder tool provides temporary support during embroidery, especially on delicate or stretchy t-shirt fabrics. It’s your go-to stabilizer for designs with high stitch counts or intricate details. You can find this stabilizer in different forms catering to varied embroidery needs. Its use is vital for achieving clean and professional-looking embroidered designs on garments. So, don’t forget to use a stabilizer when prepping for your next embroidery project. Of course, you can choose other removable stabilizers.
Scissors
Good scissors are essential for making precise cuts on stabilizers and threads. You need scissors to achieve a perfect finish when working with embroidery. Choose small, precise scissors when working with delicate stitches in complex needlework on fabric. Maintain separate scissors for fabric and paper to prevent premature dulling. Regularly sharpen your scissors and maintain them well to avoid fraying or snagging.
Iron
Make sure your scissors are sharp. Then, get your iron, which is another important tool for embroidery. This isn’t just about aesthetics; a well-ironed shirt provides a stable, smooth surface for your embroidery process. Ironing your shirt properly creates a wrinkle-free canvas, eliminating any creases or folds that could distort your design. It also makes sure that the fabric is clean and free of dust or debris that could affect your stitching. When you apply the stabilizer, it’ll adhere better to a smooth, ironed surface. So, don’t skip this crucial step. Remember, the quality of your embroidery work is directly influenced by your preparation.
A Soft Touch Backing
Before starting the embroidery, a soft touch backing is optional. This component provides the much-needed support to your shirt during the embroidery process. It ensures your design remains intact and distortion-free while stitching.
Learning How to Embroider a T-shirt
You’re ready to take the plunge into embroidering your T-shirt. Start by transferring your design onto the stabilizer. Carefully attach your design to the T-shirt. Then use a hoop to avoid stretching the fabric, and start embroidering your pattern with different stitches. The following is an instruction on embroidering clothing for beginners.
Step 1: Transfer your Design onto the Stabilizer

Go ahead and print your design now. Then trace or sketch your desired design onto the water-soluble stabilizer. It is very important for transferring your design and getting your embroidery project off to a good start. If your design is intricate, consider using a light table or a bright window for easy transfer. Once you’ve transferred the design, properly hoop the stabilizer. Please center the design to ensure accurate placement on your shirt. Now, it’s time to get your embroidery machine set up. Choose thread colors that will enhance your design. You might want to use a basting stitch around the design to secure the stabilizer and fabric during embroidery.
Step 2: Secure your Design onto T-shirt

Once the design is transferred to the stabilizer, you need to stick the stabilizer to the t-shirt to ensure a smooth and accurate embroidery process. Start by applying a non-woven stabilizer at the back of your shirt. This will provide a sturdy base for your work and prevent puckering, resulting in a smooth finish. Next, apply a water-soluble stabilizer on the front where your design will be embroidered. This ensures that your design stays intact during the process.
Step 3: Hoop your T-shirt without Stretching the Fabric
To keep your embroidery design in shape, it’s important to learn how to hoop your T-shirt without stretching the fabric. This step is often overlooked but crucial in the embroidery process. Start by laying your T-shirt flat on a table; this helps avoid the dreaded stretch. Carefully smooth out wrinkles or folds on your shirt. Remember, you’re aiming for a flat, even canvas to work your creativity.
Next, comes the hoop. Use the grid lines as your guide for perfect placement and alignment, avoiding any skewness in your design. Carefully fasten the hoop over your shirt. The key is to keep it taut, not overly stretched. Lastly, double-check the shirt’s positioning in the hoop. Placing things correctly now will lead to a stunning design that is perfectly centered and aligned in the future.
Step 4: Begin Embroidering your Pattern with Embroidery Stitches

Now that your shirt is properly placed in the hoop, it’s time to use your chosen embroidery stitches to bring your design to life.
Thread your embroidery needle with the desired color. Use a back stitch or running stitch for outlines if needed. When it comes to creating solid areas, you should definitely consider using the satin stitch technique. If texture is what you want, opt for French knots.
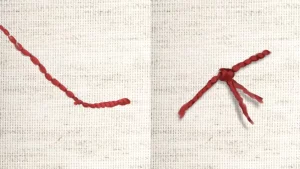
Each stitch should be worked carefully to maintain tension and ensure evenness. Trim off any unnecessary thread to achieve a polished and neat finish. Be mindful of your thread management, avoiding tangles to ensure smooth progress.
With patience and precision, every stitch moves you closer to a finished, beautifully embroidered shirt.
Step 5: Wash your T-shirt to Remove Stabilizer

To finish your embroidery project, wash the shirt gently with cold water and mild detergent. This will remove any remaining water-soluble stabilizer. This process is crucial to maintain the integrity of your embroidered design.
Avoid harsh chemicals or bleach as these can damage both the embroidery and the fabric. Gently move the water with your hands to ensure the soap gets into the fabric, removing the stabilizer without ruining your design.
After washing, opt for air drying or a tumble dry on low heat to prevent distortion of your design. For a neat finish, iron the shirt inside out. This step gives your embroidered shirt a crisp, professional look, making all your hard work pay off.
Step 6: Add a Soft Touch Backing to the T-shirt

To make your embroidered shirt more comfortable and professional looking, add a soft backing to the back of the design. This isn’t just an aesthetic choice; it’s about skin protection too. The backing is a barrier that protects your skin from irritation caused by embroidery stitches. It is particularly useful for people with sensitive skin.
Applying the soft touch backing is a simple process. After completing your embroidery stitches, cut a piece of the backing material, slightly bigger than your design. Carefully adhere it to the back of your stitches. This layer works in tandem with the stabilizer, enhancing the feel of your shirt and delivering a high-quality, professional finish. This step truly makes your shirt ready-to-wear and aesthetically pleasing.
Step 7: Iron your T-shirt and Remove Wrinkles

To improve your embroidered shirt, you should first add a soft touch backing. Then, you need to iron out any wrinkles to make your design look professional and polished. Grab your iron and heat it to a suitable temperature for your fabric.
Flip your shirt inside out to avoid direct contact with your embroidered design, thus preventing any distortion or damage. Use a gentle, back-and-forth motion across the fabric, paying extra attention to delicate areas. The heat from the iron relaxes the fibers, smoothing out wrinkles and leaving your shirt looking crisp and neat.
Conclusion
You’ve got it! With the right tools, a bit of patience, and this guide, you’re well on your way to mastering the art of shirt embroidery.
Remember, a clean shirt and careful prep work make for a neat finish. Don’t fret about designing: start with outsourcing and learn as you go.
Now, set those fears aside, let your creativity flow, and transform your shirt into a unique masterpiece. Please start your DIY hand embroidery crafts with a small piece of clothing!
