You’re about to embark on a creative journey to embroider a stunning butterfly. With the right supplies in hand, you’ll transfer the butterfly pattern onto your fabric. Next, you’ll outline the wings and veins, and then fill in the wing areas with various stitches. To achieve a smooth body line, you must master maintaining consistent stitch length. As you work on your butterfly, pay attention to the small details that will make your design outstanding.
Key Takeaways
- Choose high-quality embroidery floss and separate strands for desired thickness to achieve vibrant colors and intricate details.
- Select the right embroidery hoop size to match your design, ensuring tight fabric tension and preventing distortion.
- Use a sharp needle, selecting the right size of thread, to create delicate stitches and precise details.
- Transfer your design accurately onto fabric using a light-colored marker, testing on scrap fabric before starting your embroidery.
- Focus on maintaining consistent stitch length to achieve a polished, professional-looking result.
Gather Your Supplies
Now it’s time to gather the essential supplies for your butterfly embroidery project. With these must-haves within reach, you’ll be ready to bring your butterfly design to life.
Embroidery Floss
Selecting the right embroidery floss for your butterfly design is crucial. It will bring your creation to life with its vibrant colors and varied textures. You’ll want to choose a high-quality embroidery floss that suits your design. This type of thread comes in a wide range of colors, allowing you to customize your butterfly’s wings and body. You can choose cotton embroidery floss, a popular option, or try silk or metallic threads for a fancier touch.
Embroidery Hoop
Gather your embroidery hoop, a crucial tool that will help you achieve smooth, even stitches. Select a hoop that’s the right size for your design and fabric dimensions. A well-chosen hoop prevents fabric distortion and makes stitching a breeze. You can choose from various hoop materials like wood, plastic, or bamboo, depending on your preference. Make sure your hoop is well-tensioned to provide stability for intricate embroidery work.
Embroidery Needle
As you prepare to bring your butterfly to life, equip yourself with a sharp embroidery needle. Choose a high-quality needle that’s ideal for embroidery, with a small eye to easily pass through fabric. Different needle sizes are available for various fabric types and thread thicknesses, so select the one that suits your design.
A Fabric Marker
You’ll need a reliable way to transfer your butterfly design onto the fabric. And that’s where a fabric marker comes in. This handy tool allows you to accurately mark the placement of your butterfly design on your fabric before embroidering.
When choosing a fabric marker, select one specifically designed for transferring designs onto fabric. Choose a marker in a light color to make it easier to see. Test the marker on a spare piece of fabric before using it to make sure it transfers smoothly and can be erased easily. Follow the manufacturer’s instructions for the best results.
How to Embroider a Butterfly
 Now it’s time to bring your butterfly to life! Following this quick tutorial, you will create a beautiful, intricate design.
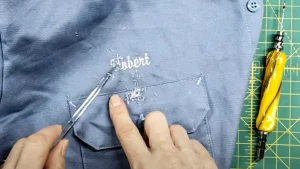
Step 1: Transfer the butterfly design onto the fabric.
You’ll begin by transferring the butterfly design onto your fabric using a water-soluble pen or transfer paper. Carefully trace the outline of the wings, body, and intricate details for guidance. Make sure the design is centered and positioned correctly on your fabric to ensure a balanced embroidery piece.
Lightly trace the design, taking care not to smudge or distort the image. Double-check your transferred design for accuracy before proceeding. This crucial step sets the foundation for your embroidery, so take your time and be precise.
Step 2: Stitch the outline of the wings and the veins within each wing.
It’s time to bring your wings to life by stitching their outline and delicate veins.
Using a split stitch or stem stitch, carefully outline the wings to create a defined shape.
Next, add smaller stitches within the wings to create the intricate vein patterns found in butterfly wings. Consider using different thread colors to highlight the veins and add depth to the wings. Remember to keep your stitches tight and neat to maintain the delicate look of the butterfly wings.
Step 3: Use long and short stitches to fill the half areas of the wing with black strands.
Fill in the half areas of the butterfly wing with black strands with long and short stitches. You’ll create a textured, multidimensional look. Experiment with different shades of black embroidery floss to add depth and dimension to the wing.
Step 4: Fill the rest areas of the wing with yellow strands.
Now use a satin stitch to cover the remaining areas of the butterfly wing with yellow embroidery floss. When filling these areas, make sure to closely pack your satin stitches to achieve a smooth, solid yellow color. Work row by row to ensure even coverage. Remember to adjust the length and direction of your stitches to follow the natural shape of the wing. This satin stitch technique will add beautiful texture and dimension to your butterfly’s wing.
Step 5: Use straight stitch to embroider the edges of the wings.
To make the wings stand out, use a thread color that contrasts with the fabric. Embroider the edges with a straight stitch to create a neat border. This stitch is perfect for outlining and defining the edges of the butterfly’s wings. It adds structure and definition to the overall design.
Carefully stitch along the wing edges, making sure to keep your stitches even and consistent. You can customize the look by using different thread colors or thicknesses for the straight stitch.
Step 6: Split stitch the body of the butterfly.
Use the split stitch to create a solid shape for the body of the butterfly.
Bring the needle up through the fabric at the starting point. Then insert it back into the fabric, splitting the previous stitch. Continue splitting the stitches to form the body shape. Adjust the stitch length as needed to create a smooth and continuous body line. This will give your butterfly a solid, defined body.
Conclusion
Now you have learned how to embroider a butterfly with a free design. With high-quality floss and a steady hand, you’ve brought this delicate creature to life. Show your hand embroidery work to your friends and they will be proud of you.

