To remove embroidery, start with a gentle tug to loosen it from the fabric. Use embroidery scissors or a seam ripper for precision cutting. Be mindful not to damage the fabric. For stubborn threads, tweezers should do the trick while a lint roller will handle the cleaning afterward. While it’s a careful process that requires a steady hand, the right tools make all the difference. Exploring further, you’ll gather insights into other successful methods and precautions for maintaining fabric integrity.
Key Takeaways
- Start the embroidery removal process by gently pulling it away from the fabric.
- Use small scissors to carefully snip any remaining threads without damaging the fabric.
- Use tweezers for precise removal of stubborn threads and a lint roller for loose threads and residue.
- Work in a well-lit area and consider using a magnifying glass for delicate fabrics to avoid accidental cuts.
- Regularly use a lint roller after embroidery removal to maintain the garment’s appearance and prevent damage.
Gather Tools for Removing Embroidery

Before embarking on your embroidery removal project, it’s critical to gather the right tools. Essential items include:
- Embroidery scissors
- A seam ripper
- Stitch eraser or safety razor
- A pair of tweezers
- Lint rollers
Having these tools makes the task easier and helps keep the fabric undamaged and clean.
Embroidery Scissor
Don’t overlook the importance of a pair of scissors. These small, sharp tools slide under the embroidery stitches for precise cutting, without damaging the fabric. An embroidery scissors pointed tips enable you to access the tightest stitches and cut them accurately.
An embroidery scissors pointed tips enable you to access the tightest stitches and cut them accurately. This precision is essential when you need to remove delicate embroidery details from clothing or other fabric items. Embroidery scissors help you remove unwanted stitches cleanly without damaging the fabric.
Seam Ripper
Don’t forget about the value of a seam ripper in your quest to remove unwanted embroidery. This tool is available at craft stores and sewing departments. It is designed to pick at threads without damaging the fabric.
Start by focusing on the top layer of thread, working meticulously to avoid damaging the underlying garment. A seam ripper helps you preserve your fabric by breaking threads at the surface, reducing potential damage.
Stitch Eraser or Safety Razor
Consider using a stitch eraser or a safety razor, both incredibly effective tools for removing embroidery.
The stitch eraser is equipped with sharp blades that effortlessly slice through threads.
On the other hand, a safety razor provides another viable option. It shaves off embroidery stitches, though it requires a steady hand to avoid unintended snags or cuts.
Tweezers
You’ll find tweezers to be an indispensable tool when tackling stubborn or small embroidery stitches. Tweezers with pointed tips are perfect for removing embroidery. They allow for precise grabbing and pulling of threads.
Lint Rollers
Use a lint roller to remove stray threads and fuzz from your fabric after removing the embroidery. This will help you achieve a smooth and clean surface. This simple tool is effective for removing those excess threads that a seam ripper or tweezers might miss. Roll the tool over the fabric where the embroidery was to pick up tiny particles.
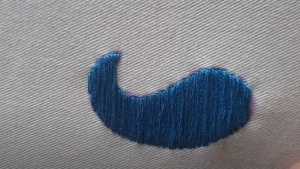
How to Get Embroidery Off

Getting embroidery off involves a few careful steps.
Firstly, flip your fabric inside out and use a seam ripper to gently tear at the threads. A stitch eraser or safety razor can be used to remove stitches. Then use tweezers to remove threads on the garment’s right side, and finally, use a lint roller to clean up any small fluff.
Step 1: Turn your Fabric Inside Out
Begin the embroidery removal process by turning the garment inside out. This exposes the back of the embroidery for easier access and precise removal. Before proceeding, ensure to remove any stabilizers from the back of the garment.
The first step is important because it gives you access to the threads in the embroidery. This makes it easier to remove them carefully and with control.
Step 2: Use a Seam Ripper to Rip the Threads
Now use a seam ripper to carefully remove the embroidery. The seam ripper is an important tool in sewing stores. It is made to carefully remove threads from embroidery without harming the fabric.
Methodically pick at each thread, starting with the top layer to avoid harming the fabric underneath. Assess the fabric’s resilience post-removal, ensuring it can conceal any holes left behind. Work diligently from both sides, pulling or breaking threads cautiously to minimize damage.
Step 3: Use the Stitch Eraser or Safety Razor to Cut Machine Made Embroidery Stitches
Use a stitch eraser or safety razor to carefully cut machine embroidery stitches without damaging the fabric. These tools are designed for precision and efficiency. They make the task of removing dense stitching significantly easier.
The stitch eraser, in particular, is a go-to tool for this task. It’s been specifically designed to cut through tightly woven threads without pulling or damaging the fabric. Alternatively, a safety razor provides a precise cut for intricate machine-made embroidery designs.
Step 4: Use Tweezers to Remove the Threads on the Right Side of Garment
Now, use a pair of tweezers to meticulously remove any remaining embroidery threads from the front of the garment. Ensure you grasp and pull out individual thread loops without causing any damage. Be patient and methodical; tweezers provide precision in such tasks.
Remember, it’s about grasping, not pulling too hard, as you don’t want to damage the fabric underneath. Working carefully will help you extract even the most stubborn or hard-to-reach threads.
Step 5: Use a Lint Roller to Remove Small Fluff
Use a lint roller to remove any remaining fluff or fibers after removing the embroidery threads from your garment. This tool is highly effective for this purpose.
Gently roll it over the fabric, paying close attention to areas where the embroidery was densely stitched. The sticky surface will attract and lift any remaining debris, leaving your fabric clean and polished post-embroidery removal.
This method is ideal for picking up tiny fibers that may be challenging to spot with the naked eye. It’s an important step to ensure your fabric is smooth and ready for any further alterations or uses.
Conclusion
With the right tools and patience, removing embroidery is no longer a daunting task. You can easily remove the embroidery logo from a shirt or jacket. Congratulations, you’ve successfully reclaimed your sartorial canvas. Now ready for your next DIY fashion adventure.
