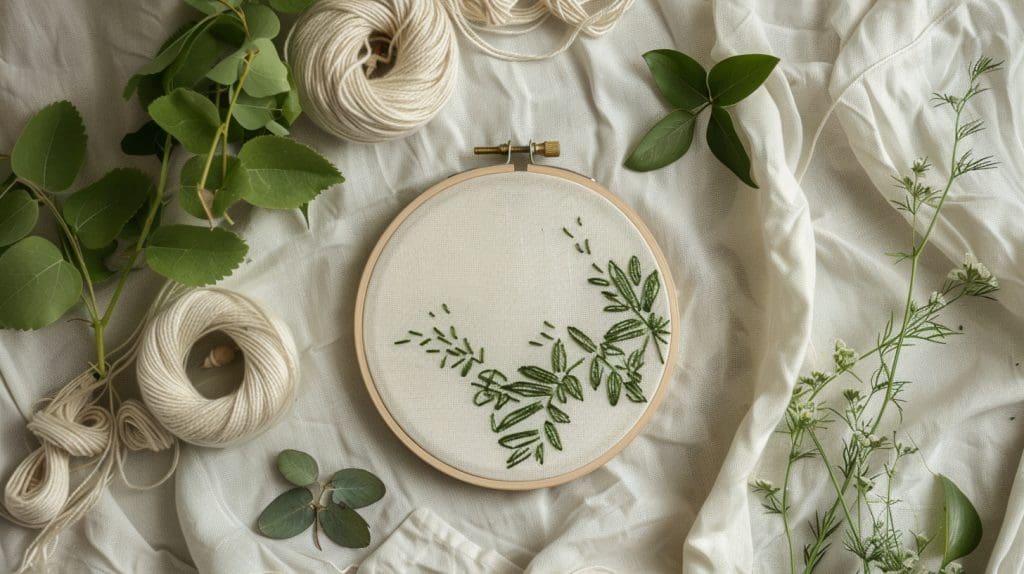
You’re about to unlock the secrets of embroidering leaves, a skill that requires patience, creativity, and some expert techniques. To get started, you’ll need to choose the right fabric, thread colors, and master some essential stitches. Wondering which stitch is best for realistic leaf veins or how to create a curved shape? With practice and guidance, you can create lifelike leaves for your embroidery pieces. Let’s explore leaf embroidery techniques and tutorials for beginners.
Key Takeaways
- Select suitable fabric and thread colors to accurately represent your leaf design. It is essential to practice stitching on scrap fabric before starting your project.
- Use various embroidery stitches to create realistic leaf shapes and details.
- Experiment with layering stitches, shading, and padding to add depth and dimension to your embroidered leaves.
- Use a combination of stitches to build up the design, working from the center outwards.
- Secure threads neatly on the back of your work, and consider displaying your finished embroidered leaf art.
How to Embroider Leaves

Now it’s time to get specific about the stitches you can use for different types of leaves. Here are some ideas for how to embroider a leaf.
Fly Stitch for Embroidering Twigs
By employing the fly stitch, you can effectively create the delicate, branching lines of twigs in your embroidered leaves. This versatile stitch is ideal for embroidering twigs and branches.
To create a more natural look, you can experiment with different thread colors and textures. By stitching loops closer together, you can create a denser appearance for your twigs.
With the fly stitch, you can easily create a natural and leafy look in your embroidery projects. Give it a try and see how it can elevate your leaf embroidery designs!
Steps:
- Bring the needle up, creating a longer stitch.
- Insert the needle back down, a short distance away, creating a shorter “V” shaped stitch.
- Alternate between longer and shorter stitches to form the twig shape.
- Space the stitches evenly and angle them slightly to mimic natural twig curves.
- Vary stitch length and direction to achieve different twig textures.
- Work in the direction you want the twig to grow, building up the stitches.
- Maintain consistent thread tension for clean, uniform stitches.
Fishbone Stitch for Embroidering Oval Leaves
The fishbone stitch can be used in embroidering a leaf. It provides a neat and structured appearance that’s especially well-suited for oval leaves. This embroidery technique allows for side-by-side threads, creating full coverage on tiny leaves.
To achieve neat and centered stitches, try drawing a middle line on your fabric. The fishbone stitch is a classic method commonly used in embroidery for creating realistic leaf designs. By mastering this stitch, you’ll be able to achieve beautifully detailed oval leaves in your projects.
Steps:
- Start at the leaf base, bring needle up and take it down in a “V” shape.
- Come up through the center of the previous “V”, create another intersecting “V”.
- Alternate “V” stitches, working up the leaf to create the fishbone pattern.
- Space stitches evenly, angling them slightly for an oval leaf shape.
- Fill the entire leaf area with overlapping fishbone stitches.
- Maintain consistent tension for a neat, patterned appearance.
- Experiment with stitch length or thread color for added texture.
Satin Stitch and Back Stitch for Embroidering Oak Leaf
You’ll find that combining satin stitch and back stitch is the perfect way to embroider an oak leaf. This leaf stitch allows you to achieve a textured, lifelike design with solid color coverage and precise details. Use satin stitch to fill in the leaf’s body, creating a smooth, solid color.
Then, switch to back stitch, stitch along the middle line, adding precise details that bring your leaf to life. Don’t forget to add veins using simple straight stitches for a realistic touch.
Experiment with contrasting colors to create a sense of depth and dimension in your design. By combining these techniques, you’ll be able to create a stunning, lifelike oak leaf that’s sure to impress.
Satin Stitch Steps:
- Start within the leaf area and bring the needle up through the fabric.
- Take the needle back down, creating a smooth, parallel stitch.
- Space the stitches closely together, filling the entire leaf shape.
- Adjust stitch length based on leaf size for even, consistent coverage.
- Work in rows, keeping stitches tightly packed and aligned.
Back Stitch Steps:
- Begin at the leaf base and bring the needle up through the fabric.
- Take the needle back down a short distance away, creating a straight stitch.
- Bring the needle back up through the fabric, just in front of the previous stitch.|
- Repeat, creating a continuous line of overlapping back stitches.
- Follow the leaf’s shape, adjusting stitch length and spacing as needed.
- Use the back stitch to clearly define the oak leaf’s edges and veins.
Chain Stitch for Leafy Branches
To create a lush, leafy branch, start by bringing your needle up through the fabric at the bottom of the branch segment. Then, insert the needle back into the fabric about 1/4 inch away, making a small stitch that forms the foundation of your chain stitch.
From there, you can build upon this foundation, adding more detached chain stitches to create sturdy branches. Use gradient colors to give your branch a natural ombre effect. You can also choose a single color palette for a more uniform look.
Steps:
- Bring the needle up through the fabric at the starting point.
- Before pulling the thread all the way through, loop it under the needle tip.
- Pull the thread gently to form a small loop on the fabric surface.
- Bring the needle back up through the fabric, just in front of the previous loop.
- Repeat, creating a continuous chain of interconnected loops.
- Vary the stitch size and spacing to follow the shape of the branch.
- Change thread color or direction to depict individual leaves along the branch.
- Fill in the branch with overlapping chains for a lush, leafy appearance.
- Maintain even tension to keep the stitches uniform and defined.
Satin Stitch for Small Leaves
Embroidering small leaves with satin stitch can fill the entire shape with a solid color block. It creates a beautiful, flat design element in your hand embroidery project. To achieve a neat finish, make sure to create opposing angled stitches on each half of the leaf. It’s essential to keep your stitches close together to avoid gaps in the design. Practice satin stitch on small leaves to perfect your embroidery skills.
Steps:
- Start within the small leaf shape and bring the needle up through the fabric.
- Take the needle back down, creating a smooth, parallel stitch.
- Space the stitches very close together, filling the entire leaf area.
- Work in tight, overlapping rows to create a solid, uniform coverage.
- Adjust the stitch length to be shorter, around 1/4 to 1/2 inch.
- Maintain consistent tension to keep the stitches flat and smooth.
- For added definition, outline the leaf with a stem or back stitch.
- Use a single strand of thread for a finer, more delicate appearance.
Chain Stitch for Color-blocked Leaves
Use the chain stitch to make beautiful, color-blocked leaves. Divide the leaf shape into sections and stitch each area with a different shade or color. This versatile stitch is perfect for effectively filling larger areas with stitches. It is perfect for creating vibrant and colorful leaves in your embroidery projects.
To add depth and dimension, start on one half of the leaf shape before moving to the other. Experiment with different colors and shades to add visual interest and texture to your design.
Steps:
- Start at the leaf base and bring the needle up through the fabric.
- Before pulling the thread fully, loop it under the needle tip to form a small loop.
- Pull the thread gently to secure the loop, then bring the needle back up through the fabric.
- Repeat, creating a continuous chain of interconnected loops along the leaf shape.
- Work in one color, filling the first section or “block” of the leaf.
- Switch to a different colored thread and continue the chain stitch in the next block.
- Alternate thread colors to create the desired color-blocked pattern on the leaf.
- Vary the stitch size and spacing to follow the organic shape of the leaf.
- Maintain even tension for a neat, defined chain stitch appearance.
Weave Stitch for Textured Leaves
By varying the direction and density of the weave stitch, you can create a textured effect on your embroidered leaves. To create textured leaves, use your needle to stitch up and down, back and forth on the fabric, ensuring the needle always goes through the fabric. Experiment with different thread colors and thickness to enhance the textured effect.
Steps:
- Bring needle up, take it under and over fabric in a wavy weave.
- Maintain tension for defined, intersecting stitches.
- Work across leaf, changing direction for irregular texture.
- Experiment with stitch spacing and thread thickness.
- Fill leaf with overlapping woven stitches.
- Outline edges with stem or back stitch.
Brick Stitch for Painting with Colors
Let’s explore the world of color with the brick stitch, a versatile technique for creating vibrant, realistic leaves with thread.
With the brick stitch, you can create stunning leaf designs that pop with color. To achieve this, use a combination of long and short stitches to blend colors effectively. Adjusting thread thickness will help you transition smoothly between different hues.
Steps:
- Secure the thread on the back of the fabric and bring the needle up at the starting point.
- Work horizontally, making small stitches and bringing the needle back down a few threads to the right.
- For the second row, offset the stitches by one or two threads, creating the “brick” effect.
- Repeat the process, offsetting each subsequent row, until the leaf shape is complete.
- Use different thread colors to fill in the leaf, varying the colors and density for shading and depth.
- Secure the thread on the back and trim any excess.
- Apply the same Brick Stitch technique for any other leaves or design components.
Blanket Stitch Outline for Bigger Leaves
Now you’re ready to add some bold, statement leaves to your embroidery project using the blanket stitch outline. Start by outlining the leaf shape with a blanket stitch for a classic look. This stitch is perfect for bigger leaves, as it creates a beautiful, textured outline. Vary the density of the stitches to create different effects on the leaf.
Steps:
- Secure the thread on the back of the fabric and bring the needle up at the starting point of the leaf outline.
- Make a small stitch by bringing the needle back down a short distance from the starting point, forming a loop.
- Continue working around the leaf outline, making evenly spaced Blanket Stitches and forming a consistent loop pattern.
- Be mindful of the tension, keeping the stitches tight and the loops uniform as you work your way around the leaf.
- Once the Blanket Stitch outline is complete, use the Brick Stitch or other embroidery techniques to fill in the leaf with colors and details.
- When you reach the end of the outline, secure the thread on the back of the fabric and trim any excess.
- Apply the same Blanket Stitch outline technique for any other larger leaves or design elements in your project.
Long and Short Stitch for Blending Colors
Stitching leaves? Try the long and short stitch technique for blending colors and creating shading effects. This technique involves alternating long and short stitches to achieve a smooth transition between colors. Use long stitches for light areas and short stitches for darker areas to create depth and dimension.
- Secure the thread on the back of the fabric and bring the needle up at the starting point of the leaf.
- Make a long stitch, covering a larger area of the leaf, and bring the needle back down a short distance away.
- Immediately after the Long Stitch, make a shorter stitch, filling in the gap and creating a blended appearance.
- Continue alternating between Long and Short Stitches, gradually covering the leaf shape and blending the colors.
- Experiment with different lengths for the Long and Short Stitches to create a more organic and natural-looking leaf texture.
- Use this technique to fill in the entire leaf shape, blending colors and creating depth and dimension.
- Once the leaf is complete, secure the thread on the back of the fabric and trim any excess.
Feather Stitch
The Feather Stitch is an excellent choice for embroidering leaves. It can be used to embroider both large and small leaves, making it a versatile technique for a wide range of leaf designs and compositions.
Steps:
- Plan the leaf design and transfer it onto the fabric.
- Start the Feather Stitch at the base of the leaf, alternating the direction of the stitches to create a feathered pattern along the veins.
- Adjust the length and angle of the Feather Stitches as you work up the leaf to follow the natural curves.
- Fill in the leaf body with other stitches like Satin or Stem Stitch.
- Add additional details like shading and highlights to enhance the realism.
Conclusion
Now that you’ve mastered the art of embroidering leaves, get creative and experiment with different stitches, fabrics, and thread colors! Take your needle and thread to embroider a beautiful leaf.
Practice makes perfect, so don’t be afraid to try new techniques and make mistakes. With patience and dedication, you’ll be creating a stunning, realistic motif that will impress anyone.
Happy embroidering, and don’t forget to sign your masterpiece!


