To knot embroidery thread, start by looping the thread around your finger. Slide the tail end through the loop and tighten to form a knot. Need it thicker? Please follow these steps again. Alternatively, hold the threaded needle and thread end to create an ‘X’. Secure the thread’s end, then wrap it around the needle 2–3 times. Pull up the needle to form the knot. Apply a little patience and dedication, you’ll perfect these techniques. Both methods are simple yet effective. Want to explore more about embroidery knots? There are 2 easy methods for beginners to thread a knot in hand embroidery.
Key Takeaways
- Thread the embroidery needle with the desired length of quality thread.
- Form a small loop by wrapping the thread around your finger or the needle.
- Pull the thread through the loop to create a knot, ensuring it’s tight and secure.
- Trim any excess thread close to the knot to prevent tangling during your embroidery work.
- Practice various knotting techniques with patience and dedication, and use a knotting stabilizer if knots slip through fabric.
Method 1 for How to Knot Embroidery Thread
Let’s kick off with the first simple method of knotting embroidery thread. You’ll start by creating a small loop, wrapping the thread around your finger. Then, thread the tail end of the floss through this loop and tighten to form the knot, repeating these steps if you prefer a thicker knot. You can learn from the following detailed tutorial.
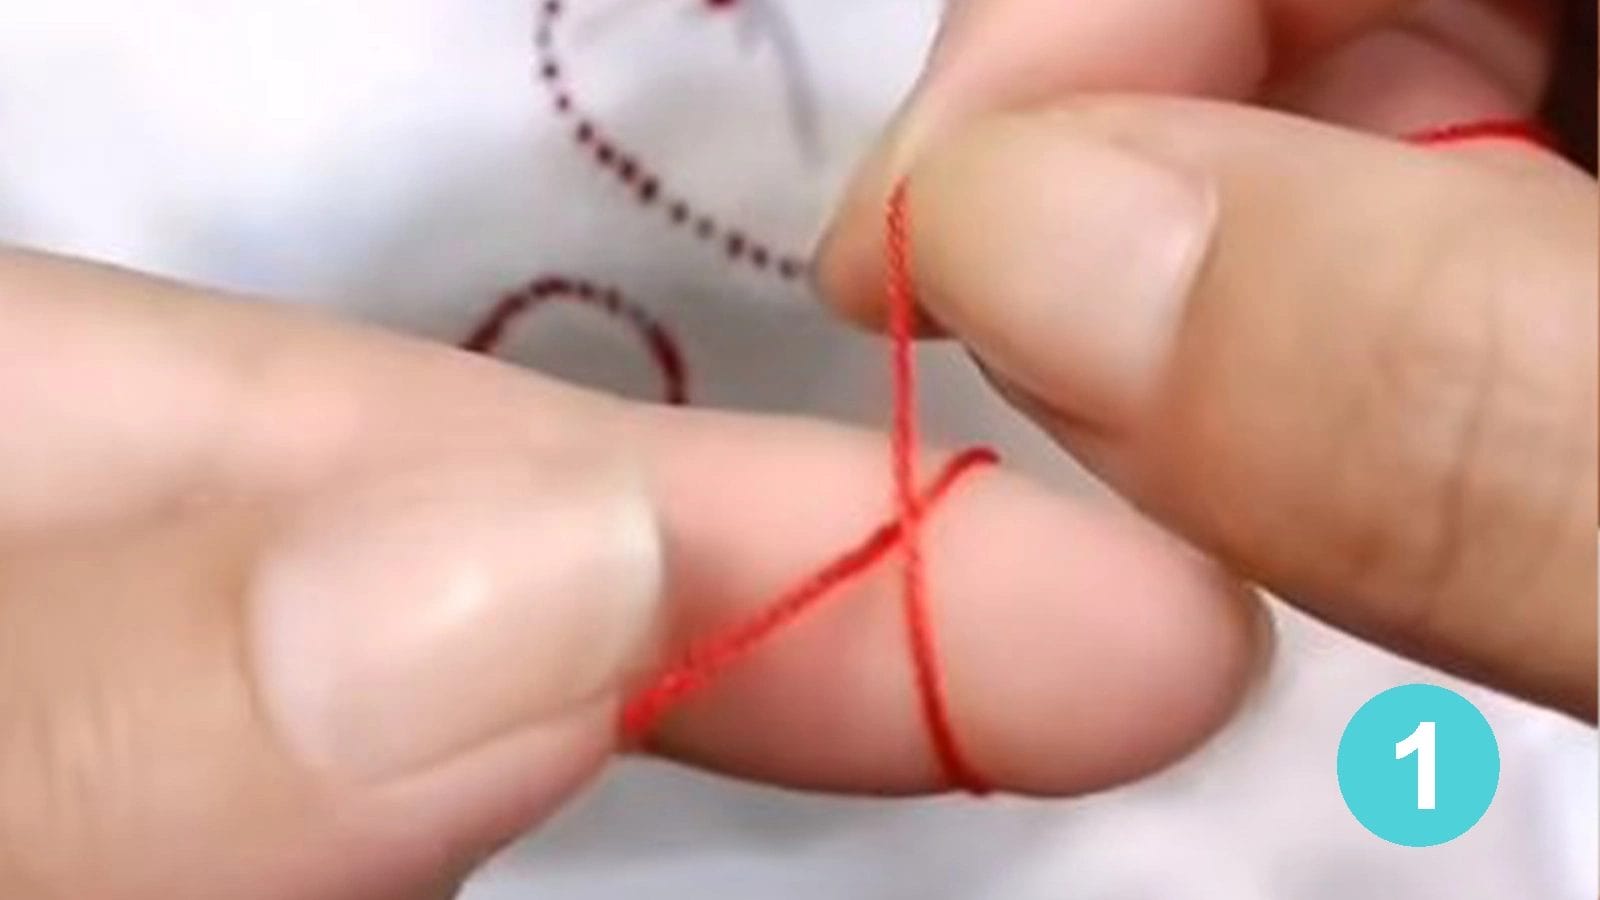
Step 1: Create a Small Hoop by Wrapping the Thread around your Finger
To start, hold the end of the embroidery thread against your finger and wrap the thread around your finger to create a small loop.
Feel the soft thread glide against your skin as you form the loop. The purpose of this small hoop is to serve as the foundation for the knot you’ll create. It’s important to keep the loop secure between your thumb and forefinger. This holds the structure in place, preventing the thread from slipping and ensuring the knot’s stability.
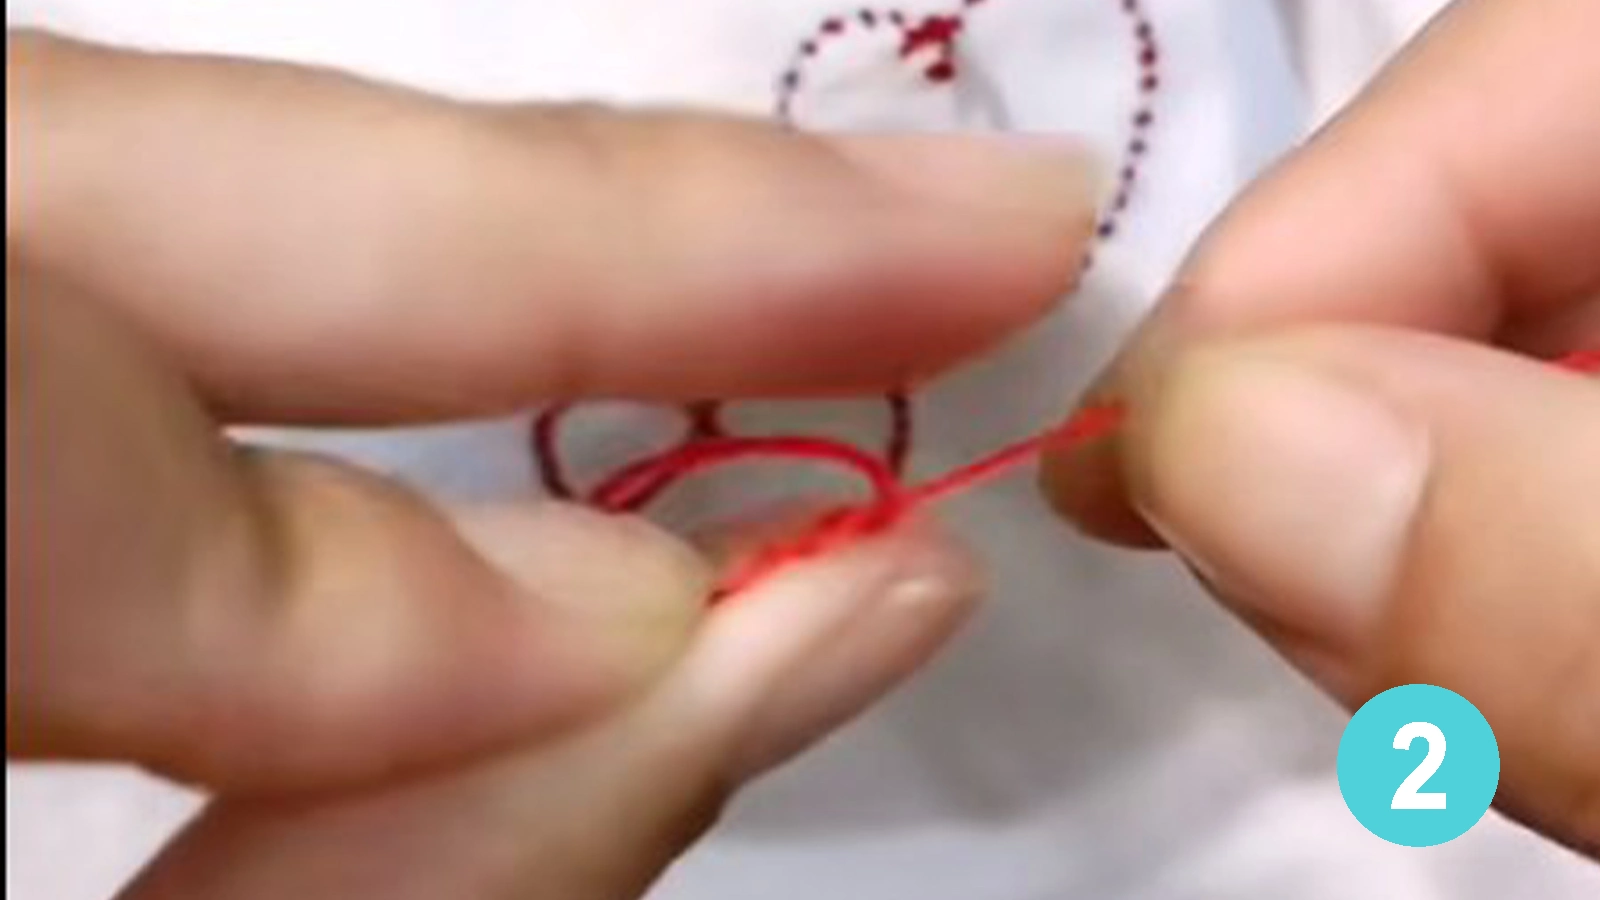
Step 2: Thread the Tail End of Floss through the Loop
Hold the loop securely in your fingers and thread the tail end of the floss through it to create a tight knot for your embroidery project. Make certain the tail end is passed securely through the loop. As you do this, be sure to maintain a firm grip on the floss to avoid it slipping.
Step 3: Tighten the Thread to Create the Knot
After threading the tail end through the loop, gently pull the needle to tighten your embroidery thread, forming a small knot. As you pull, you’ll see the thread coil tighten into a minuscule, yet sturdy knot.
Adjusting the tension is crucial to create a small knot that’s just right. Too loose, and your knot won’t hold; too tight, and you risk puckering the fabric. Maintaining a steady pull, coupled with holding the fabric taut, can give you better control.
Step 4: Repeat the Steps to Make the Knot Thicker
If you’re aiming for a thicker knot in your embroidery work, start by repeating the winding process around the needle. By gathering more thread on your needle, you’re essentially building up the thickness of your knot. Make sure to pull the thread tightly after each winding. This will compact the knot and give it a robust structure.
The beauty of this method is its adjustability. You can control the knot size and thickness by how many times you wind the thread.
Method 2 for How to Knot Embroidery Thread
Ready to tackle Method 2 for knotting embroidery thread?
This technique is simple but effective. You hold the threaded needle and tail end of the floss, create an ‘X’ shape, and then secure the end to prevent slippage.
By wrapping the thread around the needle and pulling tight, you’ll create a tidy knot for your project. Now begin your embroidery project with the following tutorial.
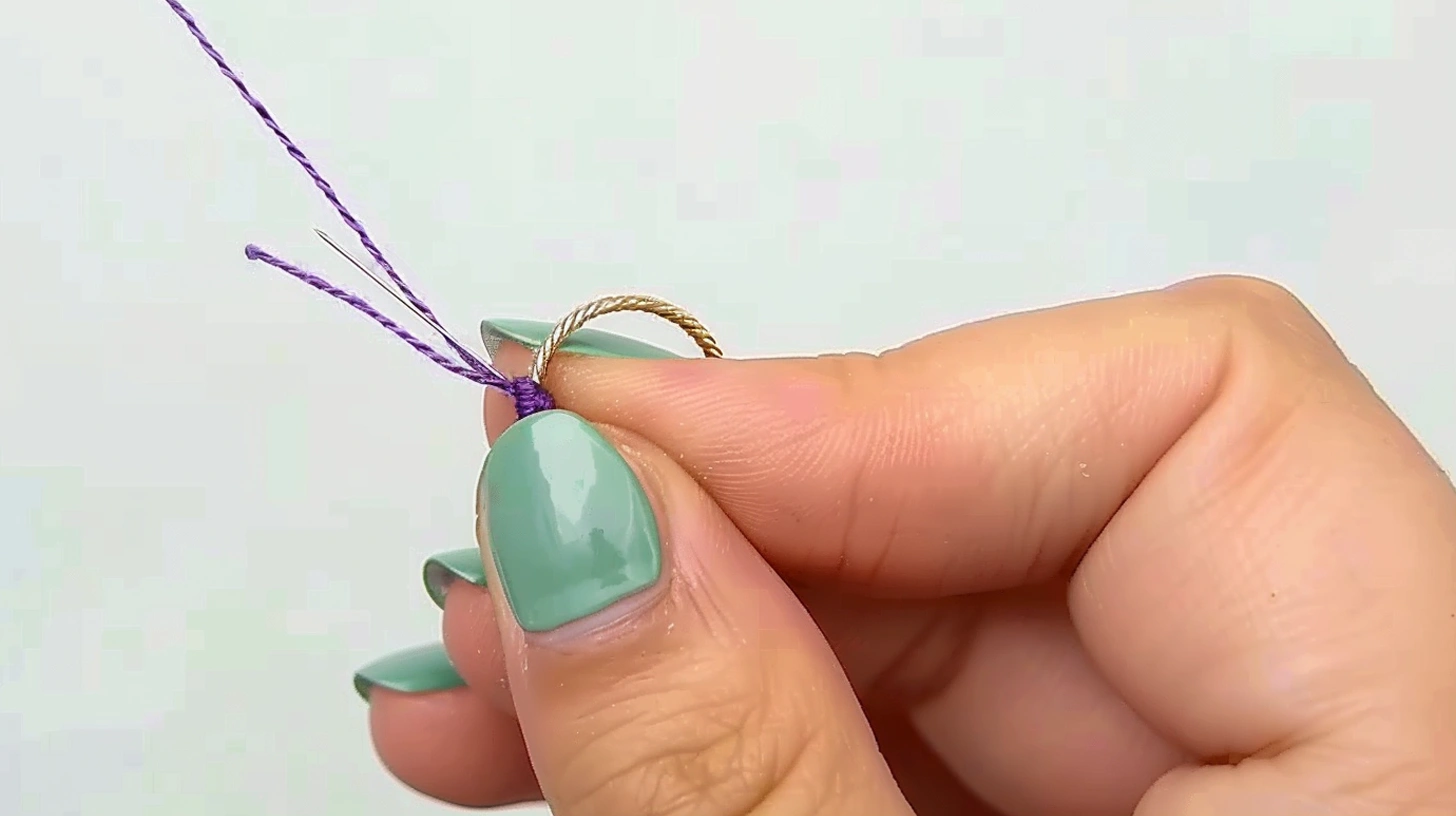
Step 1: Hold the Threaded Needle and the Tail End of Floss
First, thread through the eye of the needle. Then hold the needle with the threaded embroidery thread firmly in your dominant hand. Hold the tail end of the embroidery floss with your other hand. Cut a piece of thread and ensure that the tail end of the floss is at least 1–2 inches long. This length allows you to wrap it easily around your dominant index finger.
After you’ve wrapped your thread, you’ll want to hold that loop securely with your thumb. This step creates a firm base for your knot.
Step 2: Create an ‘X’ Shape with the Needle and the End of Thread
Now, with the needle in one hand and the end of the thread in the other, you’ll create a secure knot by forming an ‘X’ shape with the two.
Keep this ‘X’ shape steady, maintaining a firm grasp on both the needle and thread. It’s this precision and steadiness that ensures a tight knot, ready to hold your embroidery work together.
Step 3: Secure the End of the Thread to Prevent it from Slipping
Ensuring the end of your thread is secure is a crucial step in achieving a professional finish. It acts as a safeguard against unraveling stitches. Please pinch the end tail of the thread. This securing technique helps to prevent the thread from slipping and maintains the integrity of your stitches.
Step 4: Wrapping the Thread around the Needle 2–3 Times
Hold the needle in one hand and the end of the thread in the other. Wrap the thread around the needle a few times. It’s vital to ensure that the thread wraps are tight and close to the needle’s eye. This process, though simple, requires a steady hand and a bit of finesse.
The wrap itself should be secure enough not to unravel but not so tight that it hinders subsequent steps. Keep your thumb and forefinger firmly on the wraps to prevent them from moving. For this technique, you need to find the right balance between wrapping securely and moving smoothly. This will help your thread and needle work together seamlessly, allowing you to create a strong knot.
Step 5: Pull the Needle up until Forming the Knot at the End of the Thread
Once you’ve tightly wrapped the thread around your needle, you’re set to gently pull it upwards, crafting a secure knot at the thread’s end. This step is crucial for your embroidery project because this knot will secure the thread firmly into the fabric.
As you lift the needle, the thread spirals upwards, curling into a knot. You need to be careful, ensuring the knot is tight and sturdy. It’s essential not to rush this process, as a loose knot could result in your thread slipping through the fabric.
Practice this knotting technique, perfecting it to achieve professional embroidery work.
Conclusion
And there you have it! Knotting embroidery thread is no longer a mystery. With these methods under your belt, you’re ready to tackle any embroidery project.
Remember, practice makes perfect, so don’t be discouraged if your first few knots aren’t quite right. Keep going, keep refining, and soon, you’ll be knotting with ease and confidence. Now you can start embroidery with these tips.
Happy embroidering! Here’s to creating beautiful, knot-free masterpieces, one stitch at a time.