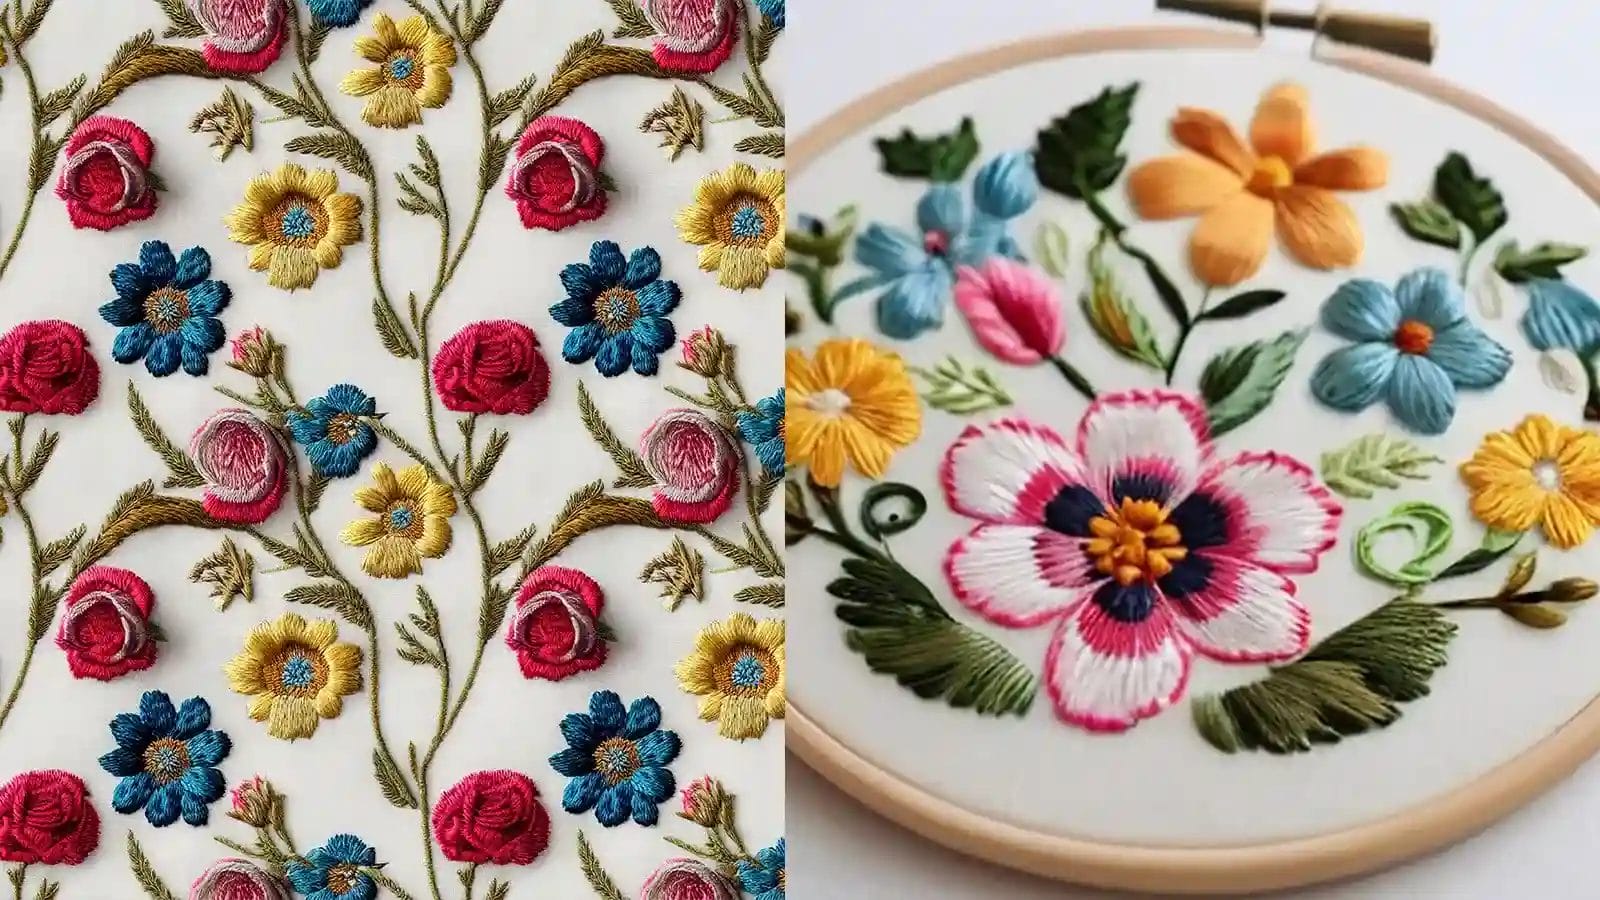
Embroidering flowers is like painting with thread, where every stitch blooms into a piece of art. You’ve got your needle and thread, an array of colors brighter than a spring meadow, and cloth as your canvas.
Imagine creating intricate petals with the Lazy Daisy stitch or crafting delicate centers with French knots. However, there’s more to it than just threading a needle. What are the secrets to mastering these stitches and bringing your floral vision to life?
Stay tuned to unravel the mysteries of this timeless craft.
Key Takeaways
- Choosing the basic embroidery tools like hoop, needle, thread, and fabric is essential for quality flower embroidery.
- Mastering various embroidery stitches like Lazy Daisy, Stem Stitch, and Satin Stitch helps in creating realistic floral designs.
- Transferring and following patterns accurately is key for successful and intricate flower embroidery.
- Practicing techniques such as long and short stitch, woven wheel stitch, and looped buttonhole stitch add dimension to embroidery projects.
Tools and Materials for Flower Embroidery
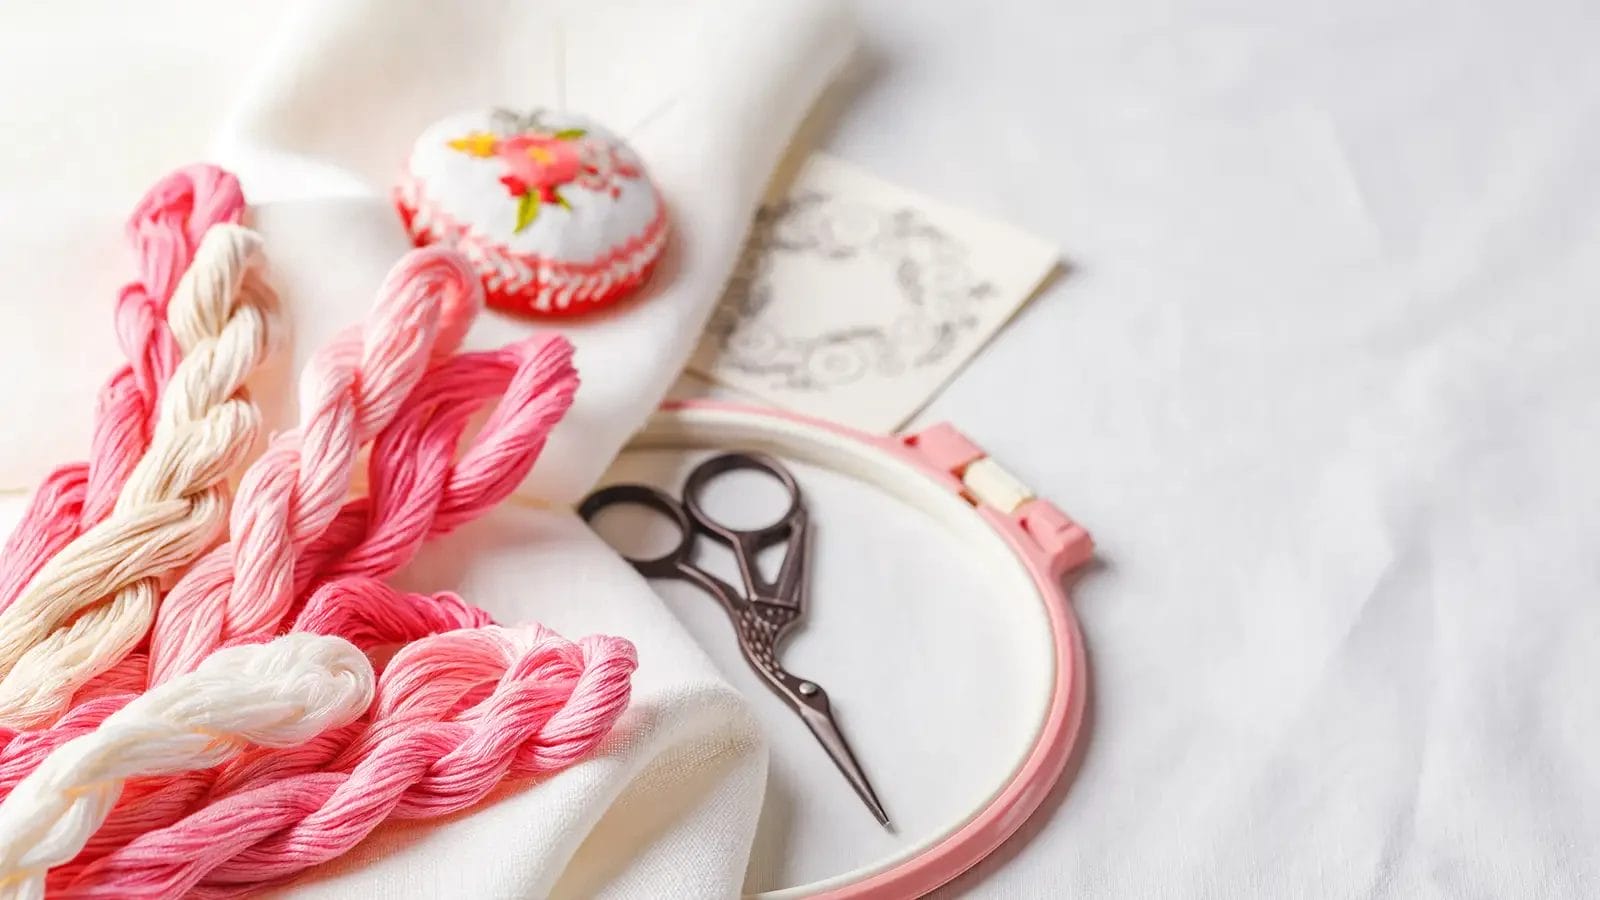
Before you start weaving petals and leaves with your thread, it’s essential to get your toolkit in order. Selecting the correct embroidery hoop, needles and threads can make your flower designs come to life. You also need a well-drawn pattern. Of course, you can also find any free pattern you like.
Embroidery Hoop
Using an embroidery hoop is essential to keep the fabric tight for better stitching and detailed designs. Choosing the right hoop size is pivotal. It affects the tension of the fabric. It also guarantees even stitches, perfectly capturing the delicate outlines of petals and leaves.
Hoops range from petite to large, so pick one that snugly accommodates your project. When tightening your hoop, ensure it’s not overly rigid to avoid distorting your fabric. This ensures a professional finish, free from unwanted wrinkles.
Once your floral masterpiece is complete, carefully remove any hoop marks to preserve the integrity of your fabric. Now, you’re a step closer to creating stunning, intricately detailed embroidery flowers.
Thread
When starting embroidery, choose the right embroidery floss to create vibrant flower designs. For delicate work, opt for 100% cotton floss, which comes in a plethora of colors to meet every floral fantasy. The lustrous sheen of this floss lends an exquisite touch to your flower designs. The thread’s thickness can also be easily adjusted by separating the six strands it usually comes in.
Pair your floss with the right fabric, such as linen or cotton, to ensure a smooth stitching surface. Remember, the better the quality of your materials, the more stunning your floral embroidery will turn out. So choose wisely and let your creativity bloom!
Needle
To create your floral design, you will need the right tool – the embroidery needle. A sharp needle with a small eye is essential for intricate flower embroidery work. It’s the magic wand that brings your design to life, creating fine details and precise stitches. Imagine it as your artist’s brush, delicately crafting each petal and leaf.
But remember, not all needles are created equal. You’ll need to choose your needle based on the fabric type and your embroidery technique. Larger eyes accommodate thicker threads, while finer needles are perfect for those delicate stitches. It’s worth investing in high-quality needles. They offer durability and smooth stitching, making your embroidery experience a dream.
Fabric
Picking the right fabric can make or break your flower embroidery project. It’s paramount to choose a smooth, tightly woven fabric to support your intricate stitching.
Here’s a quick guide to help you choose the best fabric for your project:
- Cotton: This versatile choice is perfect to embroidering flowers due to its smooth texture.
- Linen: With its slightly rough texture, linen adds a rustic charm to your work.
- Aida Cloth: Ideal for beginners, it provides a clear grid for your stitches.
- Stabilizers: Don’t forget to reinforce your delicate fabrics with tear-away or wash-away stabilizers.
Embroidery Patterns
For flower embroidery, you’ll need various tools and materials. These include a pattern that illustrates petals, stems, leaves, and intricate floral designs. Embroidery patterns are vital guides to creating stunning hand embroidery pieces. They range from simple floral motifs to complex bouquets, allowing you to select a pattern that matches your skill level.
Your chosen pattern will dictate the stitches you’ll use to bring your flower petals to life. You will use embroidery floss, needles, and hoops to transfer your design onto fabric. Follow the pattern carefully to create a visually appealing result.
Scissors
Scissors are essential for flower embroidery, cutting floss and trimming fabric precisely. A good pair of embroidery scissors have sharp tips, perfect for detailed work on your delicate flower designs.
Pencil or Chalk
Sharp scissors help with precise embroidery, but it’s your pencil or chalk that brings your floral designs to life. Having these tools is essential for effectively transferring designs onto fabric. You can sketch intricate petals, stems, and leaves with a pencil, or use chalk for temporary markings. The precision a pencil offers is particularly helpful when crafting detailed elements of your embroidery flowers. Chalk provides a clear guide for stitching. And it can be easily wiped away once your work is complete. Remember, the success of your floral designs hinges on how well you can transfer your designs.
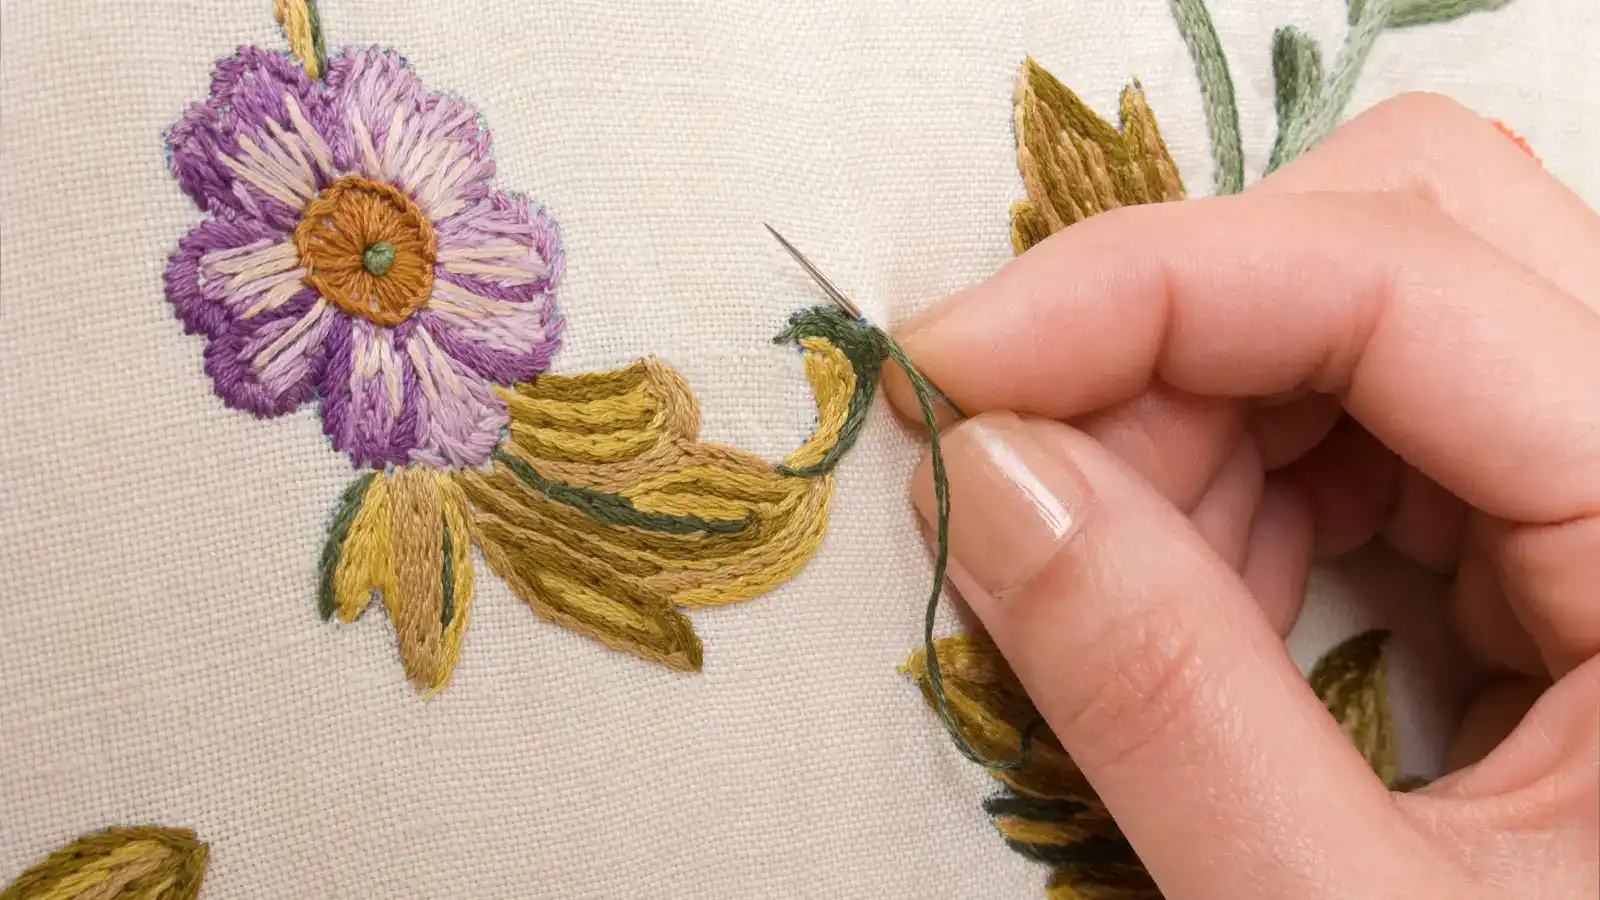
How to Embroider Flowers
Let’s get started on your embroidery journey. You’ll be using the straight stitch for flower petals, the French knot for buds and centers, and the lazy daisy stitch for oval petals. Make your stems stand out using stem stitch, and create branches with the chain stitch. There are different ways to embroider flowers. Now you can learn how to embroider flowers by following tutorials.
1. Flower Petals: Use Straight Stitch
Mastering the straight stitch is key to creating simple, yet elegant petals for your embroidered flowers. This basic stitch forms the foundation of your floral embroidery, adding a touch of sophistication to your designs.
Here is a simple guide to using the straight stitch for your petals:
- Bring your needle up through the fabric at your desired starting point.
- Begin the first stitch. Make a straight stitch by pulling the needle and thread all the way through.
- Vary the length and spacing of your stitches to create different petal shapes and sizes.
- Practice this stitch on scrap fabric for precision and control.
2. Flower Buds and Flower Centers: Use French Knot
To make your floral designs more detailed, you can use French knots. They are great for creating intricate flower buds and centers. This technique elevates your embroidery flowers with dimension and texture. To make a French knot, bring your needle up from the fabric’s back, wrap the floss around the needle, and then insert it back close to where it emerged.
The beauty lies in the detail – the size of your French knot depends on the number of wraps, with more wraps resulting in a larger knot. Practice on spare fabric before implementing it into your design.
With French knots, your flower buds and intricate flower centers will come to life.
3. Oval Petals: Use Lazy Daisy Stitch
To create delicate, petal-like shapes in your embroidery, you’ll find the Lazy Daisy stitch invaluable. This stitch is perfect for creating a variety of floral designs, particularly those with oval petals. This stitch is perfect for making flowers like daisy flowers and sunflowers. It also can create a pattern similar to lavender.
Here’s the step-by-step instruction:
- Begin by pulling your needle up through the fabric where you want the tip of the petal to be.
- Then, push the needle back down through the same hole, but don’t pull it all the way through yet.
- Bring the needle up again where you want the base of the petal to be, and pass it through the loop of thread you’ve just created.
- Finally, push the needle back down just outside the loop to secure the petal.
Trace your design and make stitches for your embroidery flowers.
4. Flower Stems: Use Stem Stitch
It’s time to focus on creating realistic and textured stems using the Stem Stitch. This technique, mimicking a twisted rope, is ideal for outlining and filling in flower stems.
Select a single strand of embroidery floss to achieve a delicate, fine stem that adds depth to your floral design. The stem stitch’s versatility allows it to adapt to various thicknesses and effects, adding a unique texture to your embroidery.
As you master this technique, you’ll notice a significant enhancement in the overall look of your embroidered flowers. So, thread your needle, let your creativity bloom, and watch as your flower stems come to life with the stem stitch.
5. Flower Stems and Branches: Use Chain Stitch
Mastering the chain stitch for flower stems and branches can greatly enhance the depth of your embroidered flowers. This technique boosts the texture and dimension, making your floral designs pop off the fabric.
Here’s a simple guide to get you started:
- Thread your needle and knot the end.
- Start from the bottom of your stem or branch and work upwards.
- Loop the thread in a chain-like pattern to form a line, making sure your stitches are smooth and even.
- Vary the length and angle of your stitches for a more natural look.
6. Roses: Use Woven Wheel Stitch
You can explore the woven wheel stitch, also known as the spider web stitch. This stitch is great for creating detailed roses in embroidery.
This stitch creates realistic, textured rose petals by weaving thread under and over a small circle of straight stitches. As you layer additional rows around the center, gradually increase the length to form the rose petals. Try different thread colors and shading techniques to enhance the depth and dimension of your roses.
The beauty of the woven wheel stitch lies in its versatility and the creative freedom it offers. With a bit of practice, you’ll be adding stunning roses to all your embroidery projects.
7. Leaves: Use Satin Stitch
When embroidering beautiful flowers, remember to use the satin stitch technique for realistic and shiny leaves. This type of flower embroidery adds depth and texture to your leaf design and makes your piece more visually appealing. As you delve into embroidery tutorials, you’ll find the satin stitch is beginner-friendly yet offers a professional finish.
Here’s a simple guide to get you started:
- Bring your needle up at the leaf’s edge.
- Stitch parallel to the leaf’s form, working stitches next to each other.
- Adjust your stitches’ length and angle to add dimension.
- Ensure your stitches cover the leaf shape evenly for a polished finish.
Mastering the satin stitch can truly elevate your embroidery projects, especially when it comes to replicating natural foliage.
8. Pansies: Use Long and Short Stitch
Explore the Long and Short Stitch technique, which is key for embroidering the color variations in pansy petals. It’s a great technique to learn once you’ve mastered satin stitch for leaves. This stitch, a staple in botanical embroidery, involves blending different shades of embroidery floss to achieve a realistic petal effect.
Start by laying down a row of alternating long and short stitches. Then, overlap the next row with stitches of varied lengths, creating a seamless gradient. By adjusting stitch lengths, you can create depth and dimension, capturing the delicate nuances of pansy petals.
Practice blending colors and changing up stitch lengths, and you’ll master the art of embroidering beautiful pansies in no time.
9. Use Looped Buttonhole Stitch for Flowers
When learning flower embroidery, the looped buttonhole stitch is very useful for creating detailed floral designs with rich texture and depth. This embroidery technique shapes flower petals with a looped edge, adding dimension that’s visually stunning.
Here’s how to do it:
- Bring the needle up from the fabric’s back.
- Form a loop by passing the needle through it.
- Repeat the process, adjusting the tightness for desired fullness.
- Continue until your flower is complete.
As you replicate this, the overlapping loops will create an impressive texture. The looped buttonhole stitch is your secret weapon for creating realistic, detailed floral elements in all your embroidery projects.
Conclusion
You’ve sketched, stitched, and brought your floral masterpiece to life. From Lazy Daisy petals to French knot centers, your embroidery blossoms with beauty. You’ve skillfully used your tools and mastered various stitches.
Now, with your stabilizer removed, it’s time to share your embroidered creation. Let the world admire the intricate details of your handiwork. You’ve proven that with patience, creativity, and a needle and thread, you can turn simple strands into stunning art.
You can now create a beautiful embroidery flower. Keep blooming in your embroidery journey!