You’ve mastered the basic crochet stitches and created some beautiful pieces. But have you ever thought about taking it up a notch? Crochet embroidery can give your work an extra layer of depth and interest. It’s not as daunting as it might seem; all it takes is a little practice and the right tools. You will learn to use cross stitch, back stitch, and the French knot in your crochet projects. So, are you ready to unlock a new level of creativity in your crochet work?
Key Takeaways
- Choose the appropriate embroidery technique like cross-stitch, back stitch, or French knots to match your crochet project.
- Use necessary tools like tapestry needles, embroidery yarn, and scissors for precise stitching.
- Practice the chosen embroidery technique on a fabric swatch before implementing it on the main project.
- Plan your stitch placement in advance and mark with fabric markers or pins to achieve a balanced design.
- Always read yarn washing instructions to maintain colorfastness and prevent damage during cleaning.
Three Common Ways to Embroider on Crochet
Let’s explore three popular techniques to embroidery on your crochet work:
- Cross stitch
- Back stitch
- French knot
Each method will give your work a unique look and feel, so don’t hesitate to experiment and see which one suits your style best.
Cross Stitch
The cross stitch is a popular embroidery technique. It involves creating X-shaped stitches on crochet projects to add texture and visual interest. To embroider on crochet using cross stitch, you’ll need yarn and a fabric that’s suited to your design.
You can work cross stitch on your crochet projects freehand or by following a grid pattern. This versatile technique can be applied to various crochet projects—think blankets, garments, and accessories. By working in rows, columns or diagonally, you can craft intricate patterns that enhance the overall appeal of your pieces.
Back Stitch
Next, you should learn the back stitch in crochet embroidery. It’s a versatile technique that gives your designs a clean, defined look by creating a solid line of stitches. The back stitch is commonly used in crochet embroidery. It is ideal for outlining designs and adding a neat detail to your work.
Using the back stitch forms a solid line of stitches that’s ideal for text, borders, or intricate patterns. Whether straight lines or curves, back stitch gives you versatility in your embroidery designs.
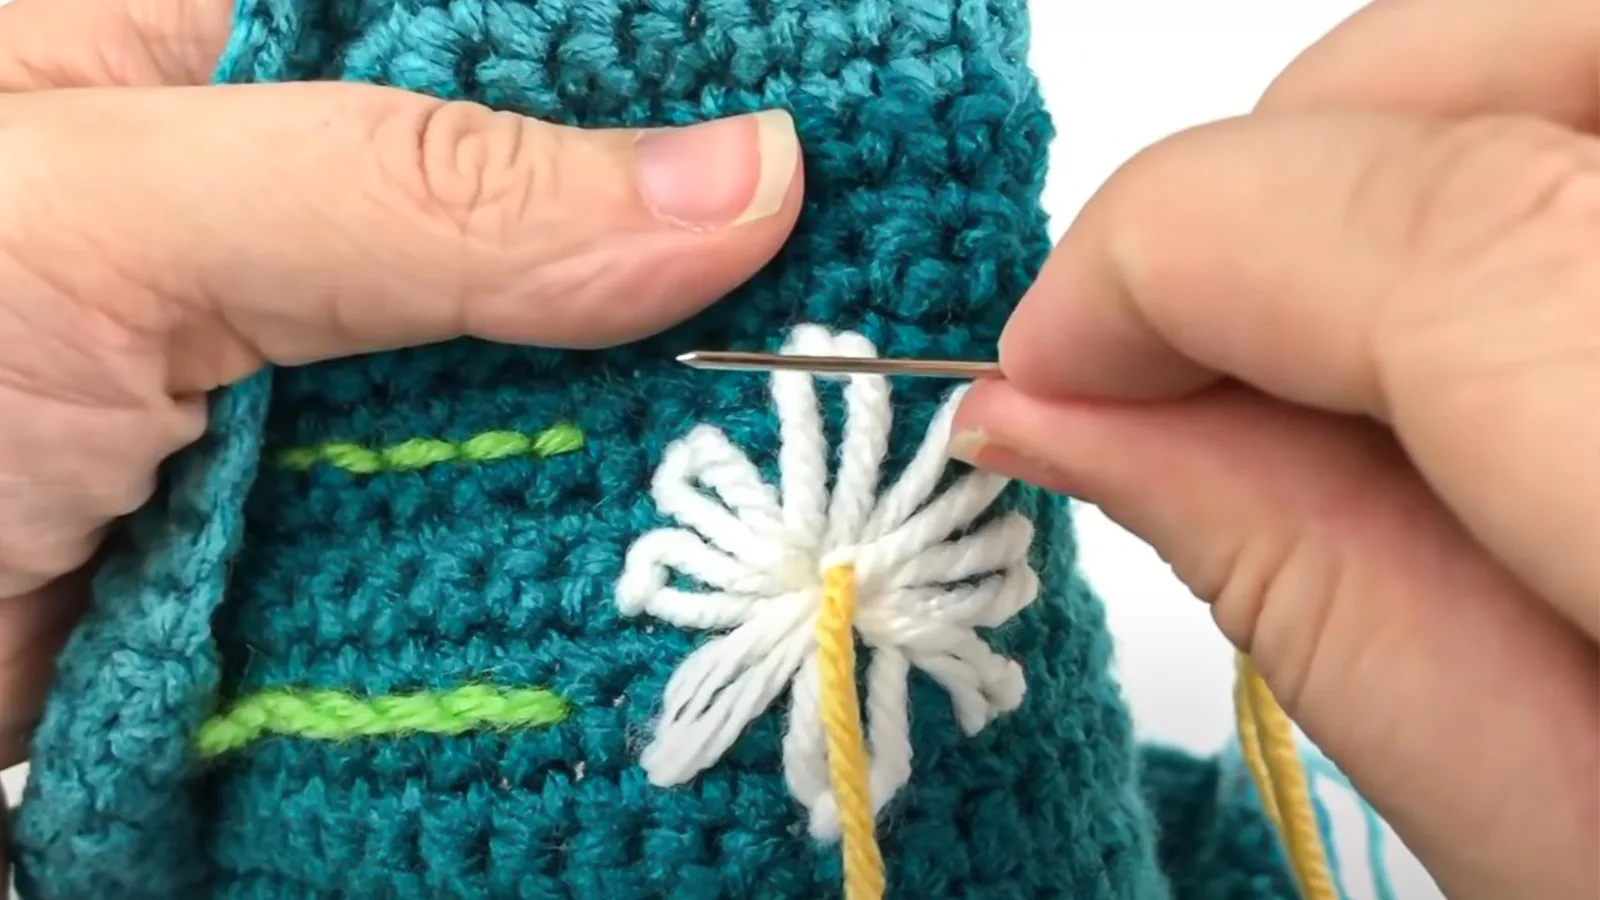
French Knot
The French knot is a simple technique that can add texture and dimension to your crochet embroidery. This raised knot method is perfect for crafting textured designs on your crochet projects. You can use these knots individually or cluster them for added dimension and interest.
Before integrating this method into your final piece, it’s best to practice the French knot technique on a sample swatch. With patience and creativity, you’ll soon master the French knot.
Supplies You Need
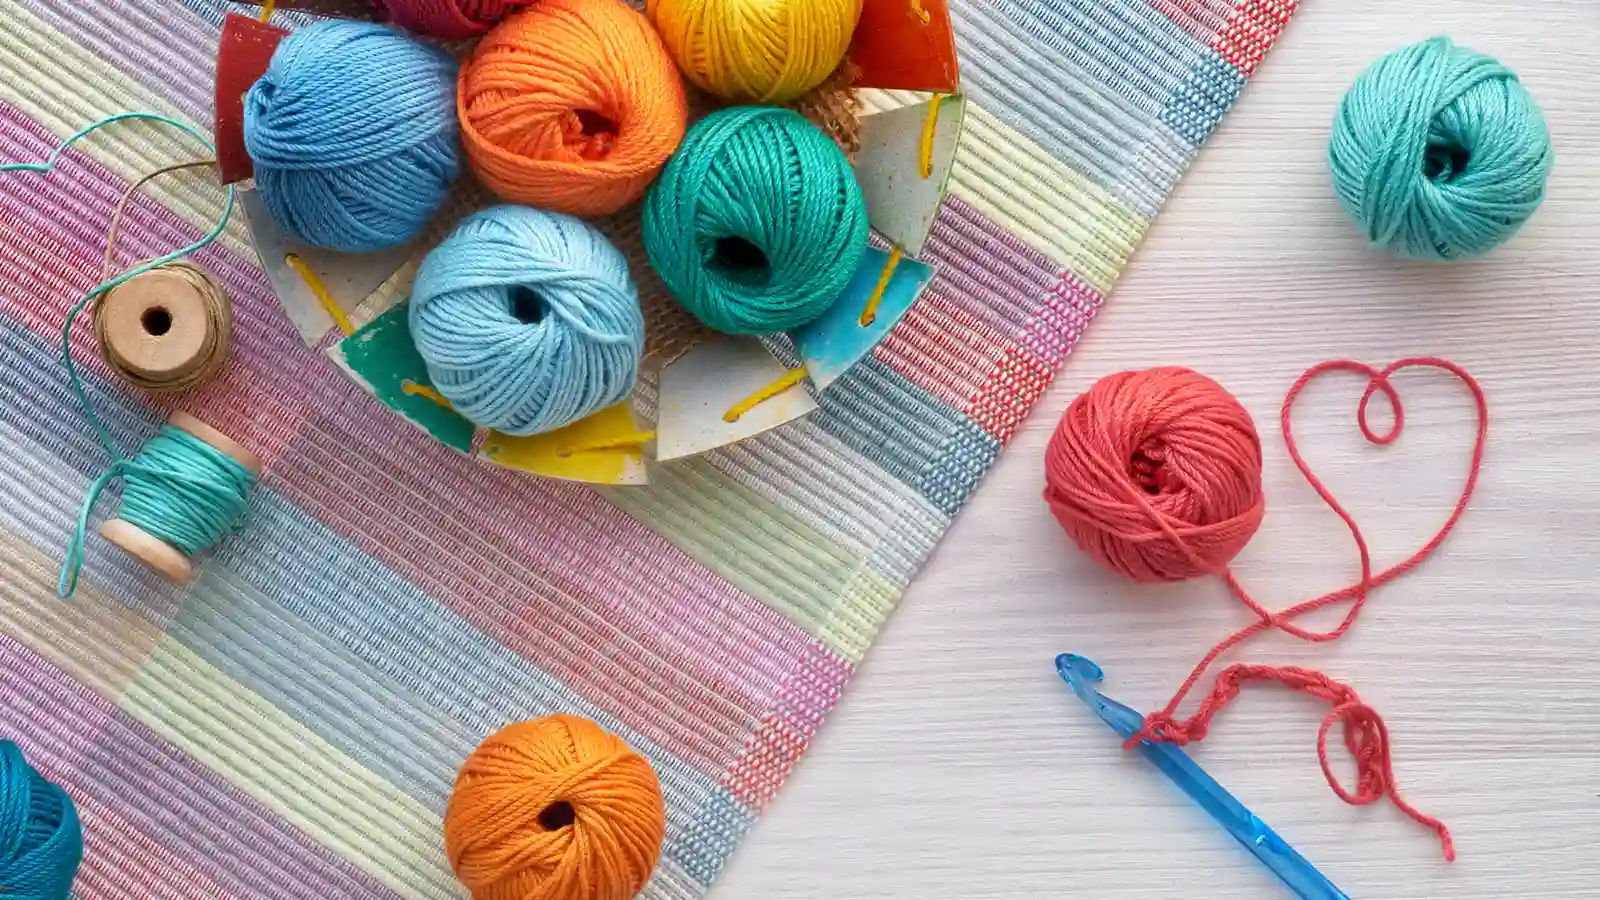
Before you embark on your crochet embroidery journey, let’s ensure you have all the necessary supplies. A tapestry needle is your primary tool, offering precision and ease in stitching. Additionally, you’ll need embroidery yarn, choosing a color and texture that complements your crochet work.
A Tapestry Needle
When starting crochet embroidery, a tapestry needle is very important. This special needle, blunt at its tip, ensures you won’t split your yarn while working. The eye of the needle is large and accommodating. So it is perfect for threading embroidery floss, making your creative endeavors less of a hassle.
The tapestry needle comes in various sizes, catering to your project’s needs. Whether you’re working on fine crochet or embarking on more intricate designs, there’s a needle to match.
Embroidery Yarn
To bring your crochet project to life, choose embroidery yarn that complements the color and matches the size of your crochet hook. Consider the weight and texture of the yarn for the desired effect.
How to Cross Stitch on Crochet
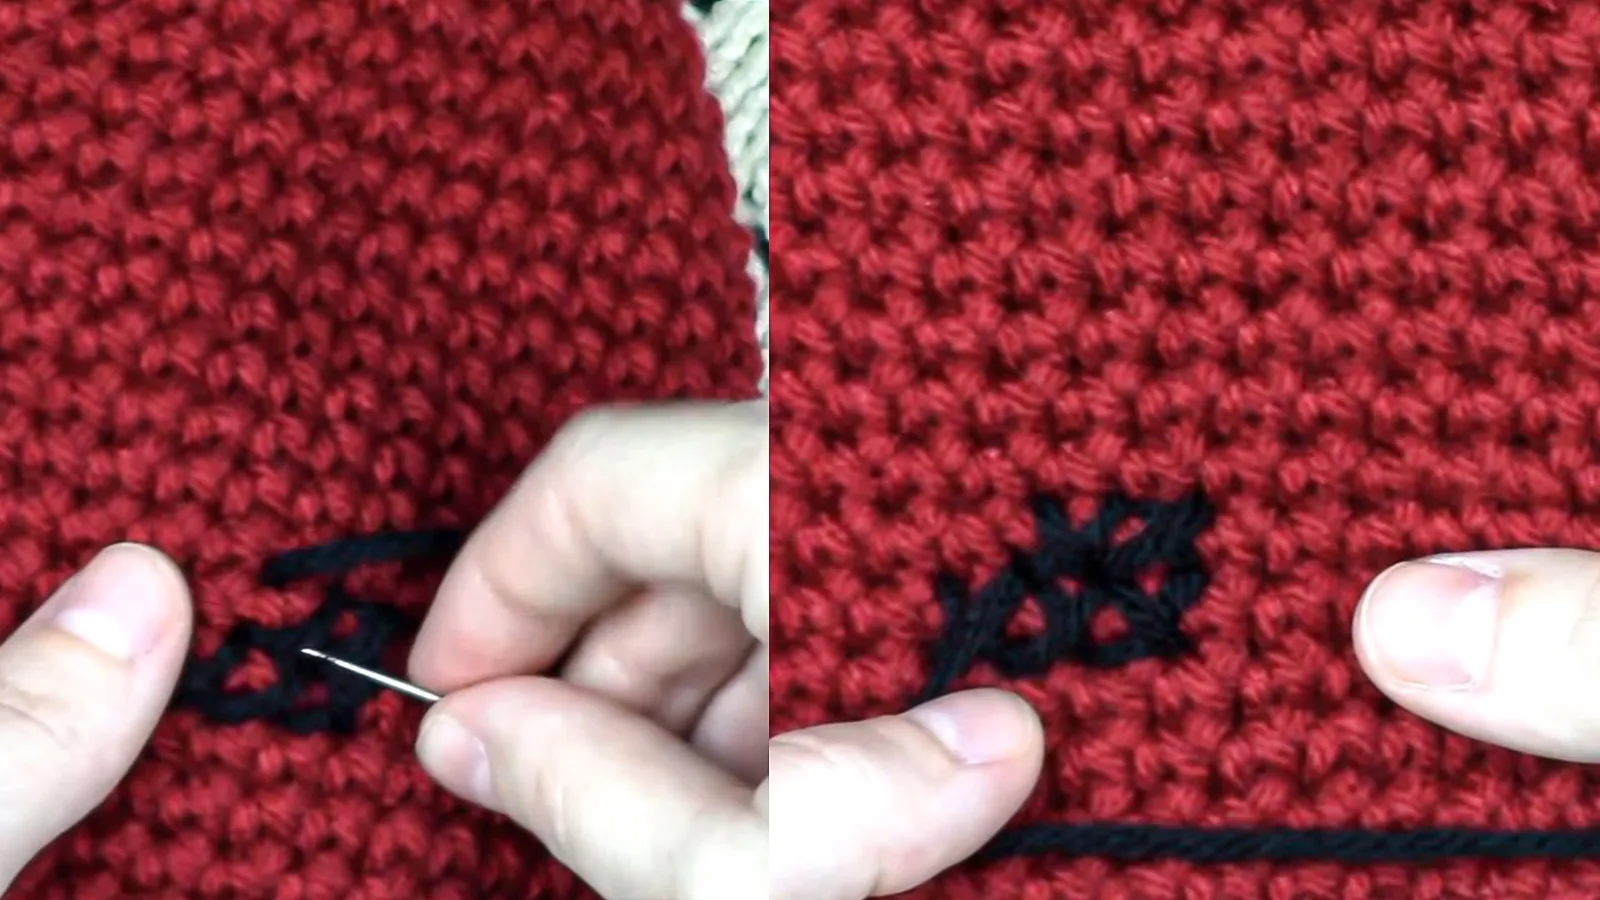
Cross stitching on crochet can amplify your project’s beauty with a unique, textured design. Let’s walk you through the steps of creating a cross stitch on your crochet work.
Step 1: Shift the needle from the rear to the front of crochet fabric so that the yarn forms a diagonal line.
To start your cross stitch on crochet, move the needle from the back to the front of the fabric. Make sure the yarn forms a neat diagonal line. This is the first step towards creating a fuller and visually striking crochet embroidery.
It’s important to maintain a consistent tension in your yarn to ensure a uniform and neat appearance.
Step 2: Move the needle through crochet fabric so that the yarn forms a cross with the previous diagonal line.
After making the first diagonal line, carefully pass the needle back through the crochet fabric, making sure the yarn crosses over to create the ‘X’ shape of the cross stitch embroidery. Now, gently pull the thread until a neat cross stitch appears.
How to Make a Backstitch on Crochet Fabric
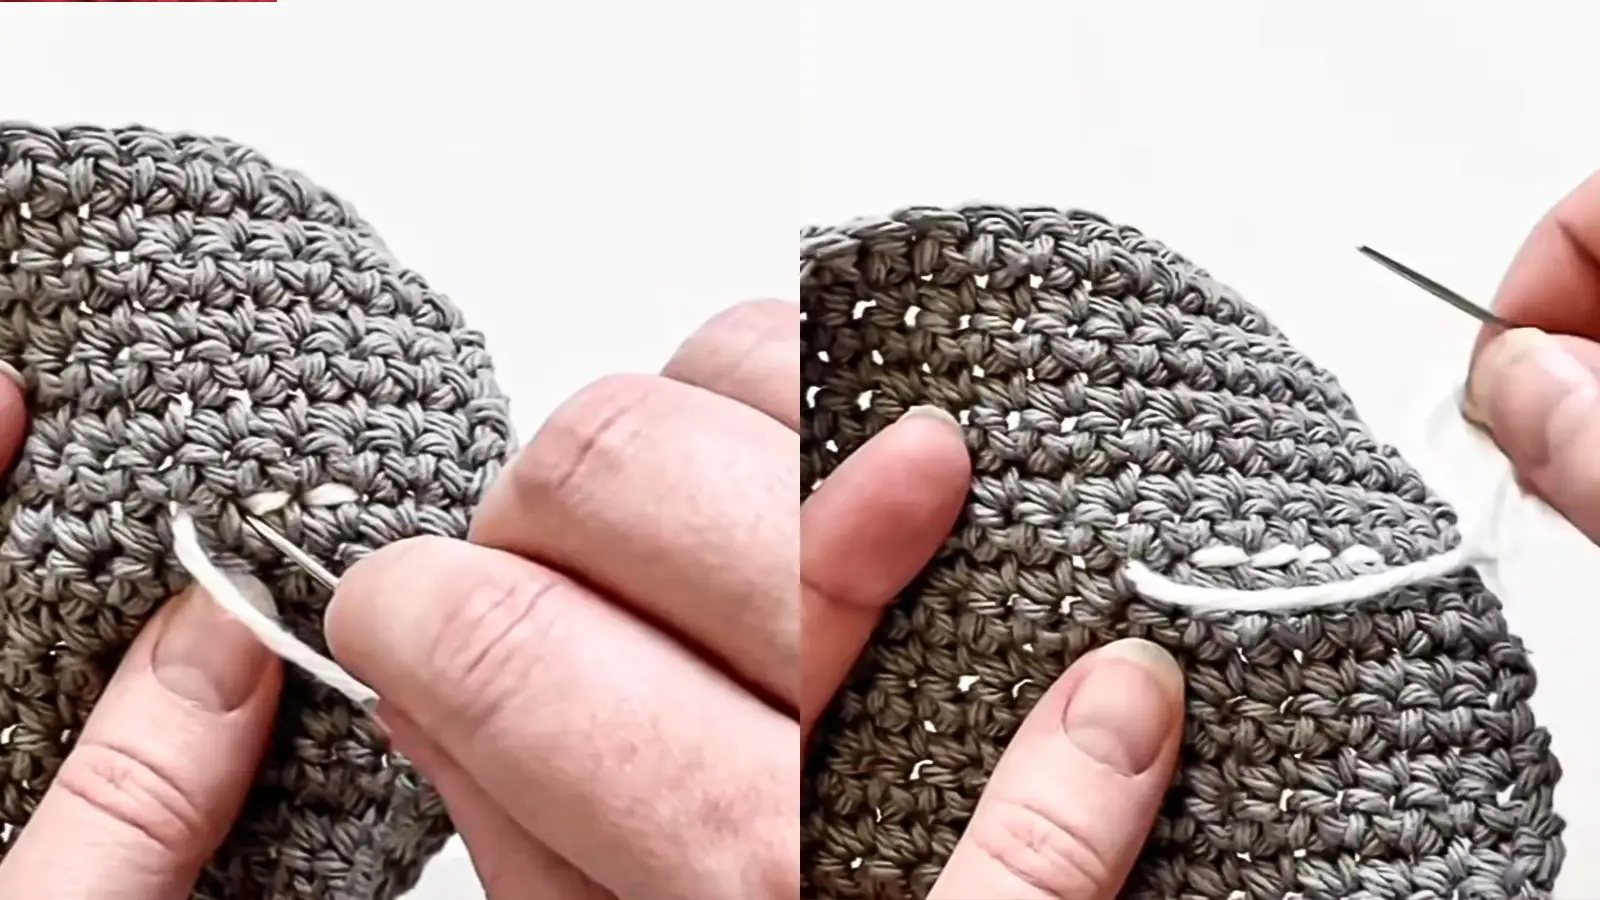
Now, let’s explore how to make a back stitch on crochet.
Step 1: Move the needle from the back to the front of crochet fabric and pull the yarn through crochet fabric.
To make a back stitch on crochet, start by placing your needle at the desired starting point on the crochet fabric. Push the needle from the back to the front. Draw the needle up, pulling the yarn’s tail through until it’s snug against the fabric. Keep the tension even, ensuring your back stitch line is smooth and straight.
Step 2: Move the needle 2 stitches to the right and bring the needle through the back to the front of crochet fabric.
Carefully move your needle two stitches to the right, piercing from the back to the front of your crochet fabric to create a back stitch. The back stitch is created with this specific movement. It is a stitch that creates a solid, continuous line, which is ideal for outlining shapes or adding text to your crochet work.
Step 3: Bring the needle 1 stitch to the left and pull it through crochet fabric.
Once you’ve moved two stitches to the right, it’s time to bring your needle one stitch to the left and deftly pull it through the crochet fabric, crafting your back stitch.
Step 4: Repeat and form a line which you need.
Once you have learned the back stitch, repeat it to make even and consistent stitches for your crochet project. To continue, pull the yarn through the eye of your needle and create your next stitch. Don’t rush: take your time to make each back stitch perfect.
How to Make a French Knot on Crochet
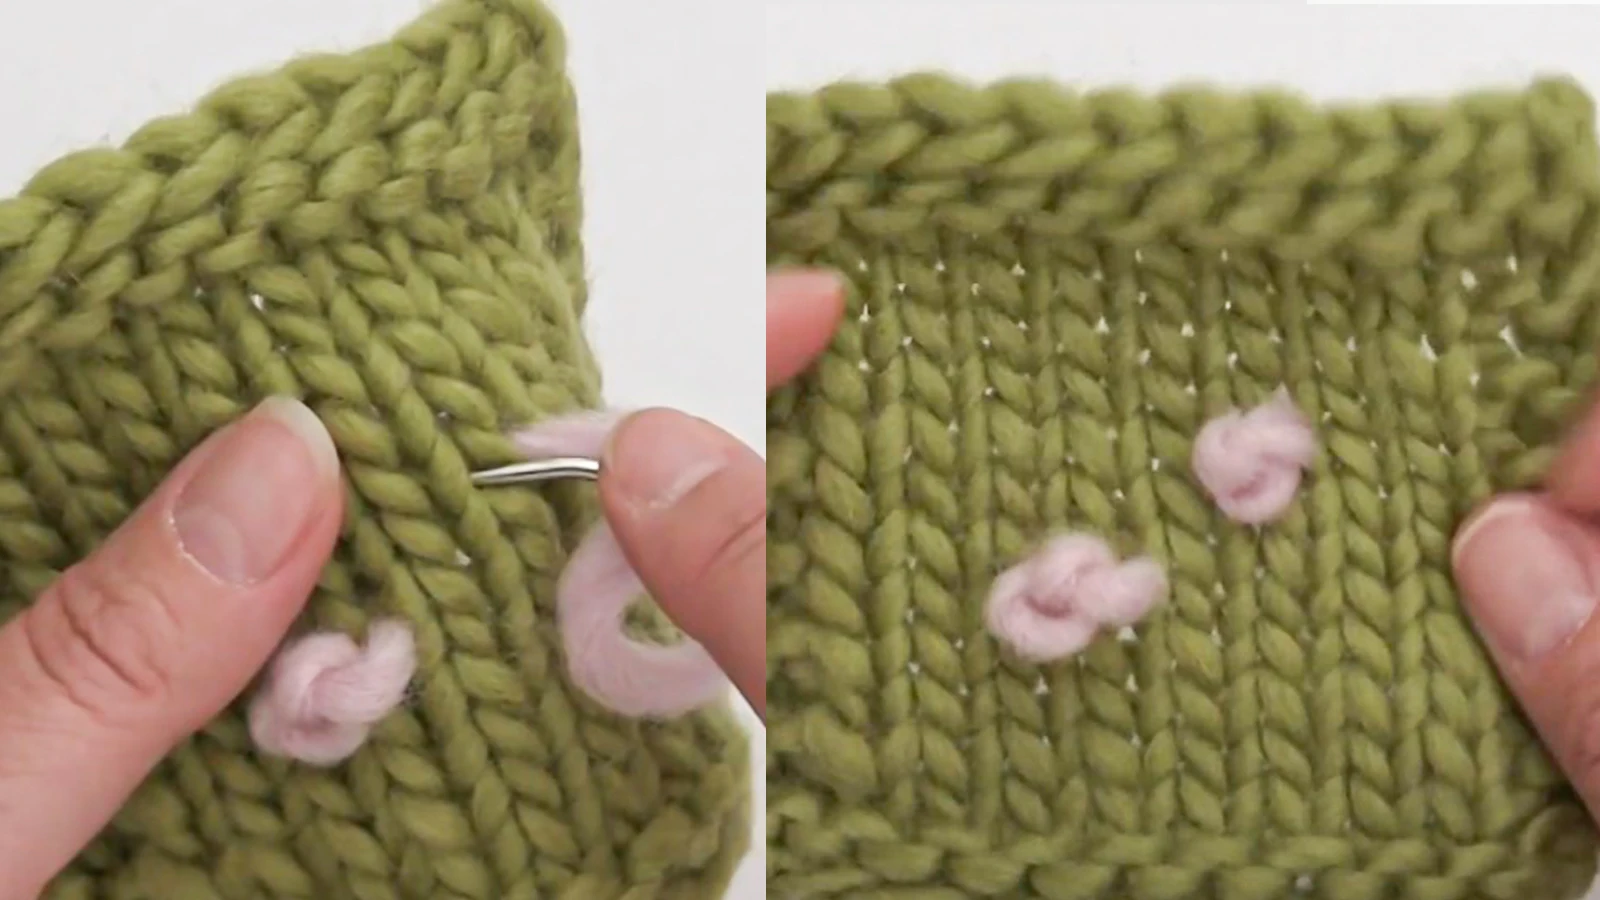
You’re now ready to tackle the French knot on crochet, a technique that adds texture and dimension to your designs
Step 1: Thread the yarn through the fabric and grasp the yarn as it comes out of crochet fabric.
To create a French knot on your crochet piece, thread the yarn through the fabric and firmly hold the emerging yarn on the other side. With the yarn threaded, bring the needle up from the back side of the crochet piece to the front. This is where you’ll begin to form the French knot.
Step 2: Keep the yarn taut and wrap it around the needle three times.
Wrap your yarn tightly around the tapestry needle three times. This step is crucial in ensuring your knot is robust, and it’s your yarn tension that’s key. Too loose, and your knot won’t hold its shape; too tight, and it’ll be difficult to pull through. The more wraps, the larger the knot.
Step 3: Reinsert the needle into the crochet fabric near the point where it was last inserted.
Once you have mastered wrapping the yarn around the needle, the next step in making a French knot on your crochet work is to reinsert the needle near where you first put it in. This embroidery technique requires precision. Gently push your needle back into the crochet fabric, creating a small loop with the yarn. This loop is the foundation of your stitch. Make sure you insert it back into the same spot to secure your knot properly.
Step 4: Keep the yarn tight and move the twists close to the fabric.
Once you’ve wrapped the yarn around your needle, keep it tight and move these twists close to the fabric. The tension of the yarn and the closeness of the twists to the fabric affect the size and stability of the knot. It’s a delicate balance to maintain, but with practice, it’ll become second nature.
Step 5: Pull the needle to form a French knot.
Now, with the yarn tightly wrapped around the needle, carefully pull the needle through to create a lovely and detailed French knot on your crochet project.
Tips and Tricks for Embroidery on Crochet
When embroidering on crochet, it’s important to consider your materials and techniques.
Choose smooth yarns and avoid using novelty yarns.
To have good embroidery on your crochet work, use smooth yarns like cotton or acrylic. They give you a clean and even surface for precise stitching. Avoid novelty yarns with uneven thickness or textures, as they can disrupt your embroidery’s precision.
Ensure your crochet fabric is dense and provides a stable base for the embroidery stitches.
It’s important to crochet your fabric tightly for a strong base for embroidery. Try to avoid lacy or openwork designs as they mightn’t support intricate embroidery stitches well. Using a thicker yarn or multiple strands of embroidery floss can give your stitches a solid base to hold onto.
To prevent damaging the fabric, stitch the embroidery evenly and avoid pulling the thread or yarn too tightly.
To master embroidery on crochet, it is important to have a steady hand and maintain even tension. This will prevent warping or distorting the fabric and design. Always remember to keep an even tension as you stitch. It’s crucial not to pull the thread too tightly; doing so can pucker or warp the crochet, damaging your piece.
Using a hoop can help you to maintain a steady grip and stable fabric. Your needle size matters too. Choose one that glides smoothly through your crochet stitches without snagging or tearing them.
Test the embroidery pattern on a piece of fabric.
Before beginning your crochet work, test your embroidery pattern on a fabric swatch first. This testing stage is crucial to visualize the final look of your project. It gives you a chance to adjust the size and colors, ensuring they complement the crochet fabric perfectly.
Decide on the placement of the stitches in advance.
When you plan to add embroidery to your crochet work, it’s important to carefully plan where each stitch will go. This tutorial aims to guide you on how to mark the placement efficiently. Use fabric markers or pins to indicate where you want your stitches to be. Planning the spacing and distribution of the stitches in advance will lead to a balanced and visually appealing result.
Read the washing instructions for the yarn you use for the embroidery to prevent colors from running during washing.
It is important to familiarize yourself with the yarn washing instructions. These guidelines are pivotal to maintaining colorfastness, as they prevent colors from running during washing. Different yarns require specific care to keep the embroidery intact and looking fresh. So, don’t overlook this step.
Conclusion
Embroidering on crochet elevates your craft, adding a captivating layer of detail. Whether you choose a cross stitch, back stitch, or French knot, practice and patience yield stunning results.
Always consider the texture and stitch pattern of your crochet piece to achieve harmony in your design.