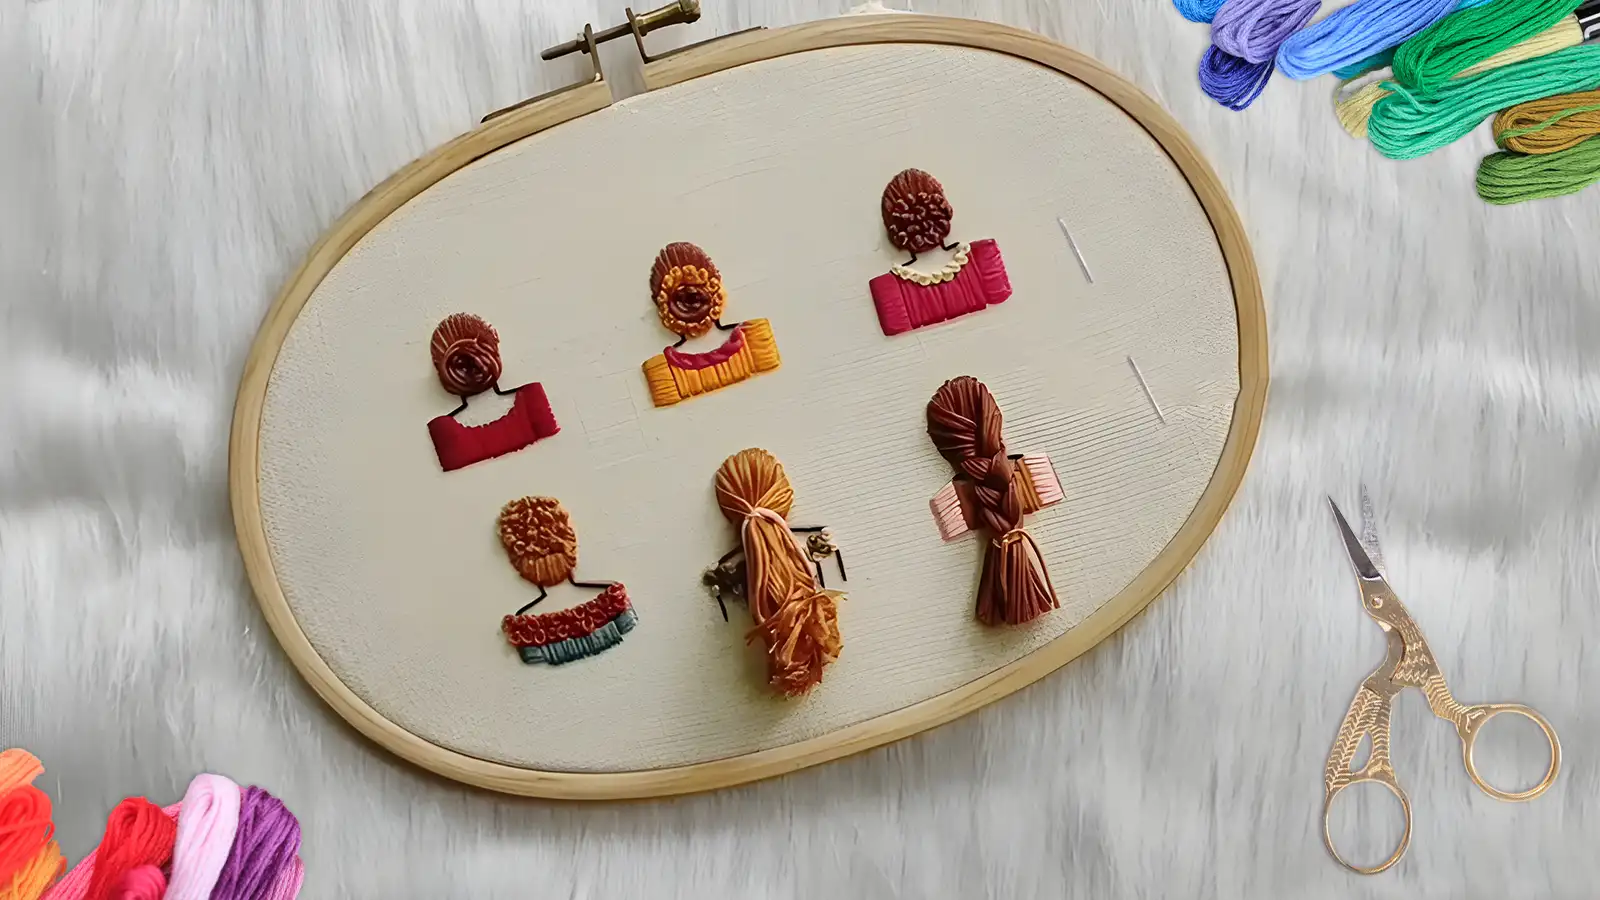
Start by creating mixed color embroidery floss to mimic natural hair tones. Next, mark the position where hair should be on your fabric, considering the hair’s flow and style. Use the Turkey Stitch to create loops that add an interesting texture to your crafting projects. Secure these loops tightly around the mark on the head, ensuring a consistent and firm hold. To enhance the depth of your embroidery, consider using satin and split stitches for filling. These techniques will add a new level of richness and dimension to your work. Never forget that achieving a flawless finish showcases your exceptional level of professionalism. Exploring further in this art, you’ll discover how to perfect hair trimming and styling in embroidery. The following tutorial will help you make embroidered hair easier.
Key Takeaways
- Select and prepare mixed color embroidery floss to enhance hair depth and dimension.
- Mark the position of embroidery hair and the girl’s head, ensuring symmetry and balance.
- Use the Turkey Stitch to create textured loops of floss for the hair.
- Work around the circle of the girl’s head, securing these loops for a professional finish.
- Use Satin Stitch and Split Stitch to fill the girl’s head, blending shades for realism.
How to Embroidery Hair
For realistic hair embroidery, mix various colors of thread together to create different shades.
You’ll then mark the position of the embroidery on the hair and the girl’s head, providing a clear guide for your work.
Use the Turkey Stitch to create loops of floss around the girl’s head. Secure the loops and then fill in the head with satin and split stitches.
Step 1: Create Mixed Color Embroidery Floss
Kick off your hair embroidery journey by creating a vibrant, mixed-color embroidery floss. Select two or more complementary colors to give your hair a unique and expressive look.
Cut each piece of floss to the desired length, ensuring each thread is equal for consistency. Hold the strands together and secure them with a firm knot at one end.
This mixed color embroidery floss will add depth and dimension to your hair, creating an eye-catching look. Don’t be afraid to experiment with different color combinations to personalize your style.
This process isn’t only about creating beautiful hair art but also about expressing your unique personality and creativity. Now, you’re ready for the next step in your hair embroidery adventure.
Step 2: Mark the Position of Embroidery Hair and the Girl’s Head
Mark the spots where you plan to embroider in the girl’s hair using a washable marker for the best result.
Consider her hair’s unique parting and style to determine the optimal position for the embroidery. Keep in mind, the marked positions should seamlessly blend with her overall hairstyle for a cohesive look.
When marking the embroidery positions, take into account the natural flow and movement of her hair. It’s essential to double-check these markings to ensure symmetry and balance.
Step 3: Use the Turkey Stitch to Make the Loops of Floss
Now, let’s dive into the heart of the process: using the Turkey Stitch to create beautiful loops of floss in the hair. This stitch is what gives your embroidery its unique texture.
You’ll start by pushing your needle up through the fabric, leaving a small tail of floss underneath. Then, wrap the floss around your needle a few times to form the loop. Once you’ve got your loop, carefully reinsert the needle back into the fabric close to where it first came out. As you pull the needle through, you’ll secure the loop in place.
Step 4: Continue to Work around the Circle of the Girl’s Head and Secure these Loops
Now that you’ve learned the Turkey Stitch, you can proceed with the hair embroidery. Start by working around the girl’s head in a circle, creating and securing loops of embroidery floss.
This stage is all about maintaining a consistent rhythm and tension, creating a seamless effect. The loops you create should be evenly spaced and uniform, which adds to the overall neatness of the design.
As you work, pay close attention to the tension of the floss. Too loose and your loops may unravel; too tight, and they could distort the intended shape of the hair.
However, with a careful touch and a keen eye for detail, you’ll secure these loops, ensuring a beautiful end result.
Step 5: Use Satin Stitch and Split Stitch to Fill the Girl’s Head
Learn to use satin and split stitches to fill in the girl’s head for a vibrant, three-dimensional effect in your hair embroidery design.
Begin with the satin stitch, a smooth, shiny technique perfect for filling larger areas. It’ll lend a glossy sheen to the hair, mimicking the natural shine of healthy locks.
Next, let’s master the split stitch technique. It’ll create a textured look, outlining and filling in strands with continuous stitches. The interplay of these two stitches will add dimension to the girl’s head.
Experiment with different shades of floss for a realistic touch. The key is blending the stitches seamlessly, giving your design a professional finish.
You’re on your way to becoming an expert in hair embroidery!
Step 6: Cut the Loops
After mastering the satin and split stitch, carefully trim the embroidery floss loops with sharp scissors. This is an important step, not just for aesthetics, but to ensure the embroidered design blends seamlessly into the hair.
When you cut, be cautious not to snip the actual hair strands. Ensure that each loop is trimmed evenly and with precision. This gives a neat, uniform appearance. Don’t rush this process. Take the time to double-check the length of the trimmed loops. If you find any loops longer than desired, simply trim them down to match the others. This attention to detail is what’ll give your embroidered hair a polished, professional finish.
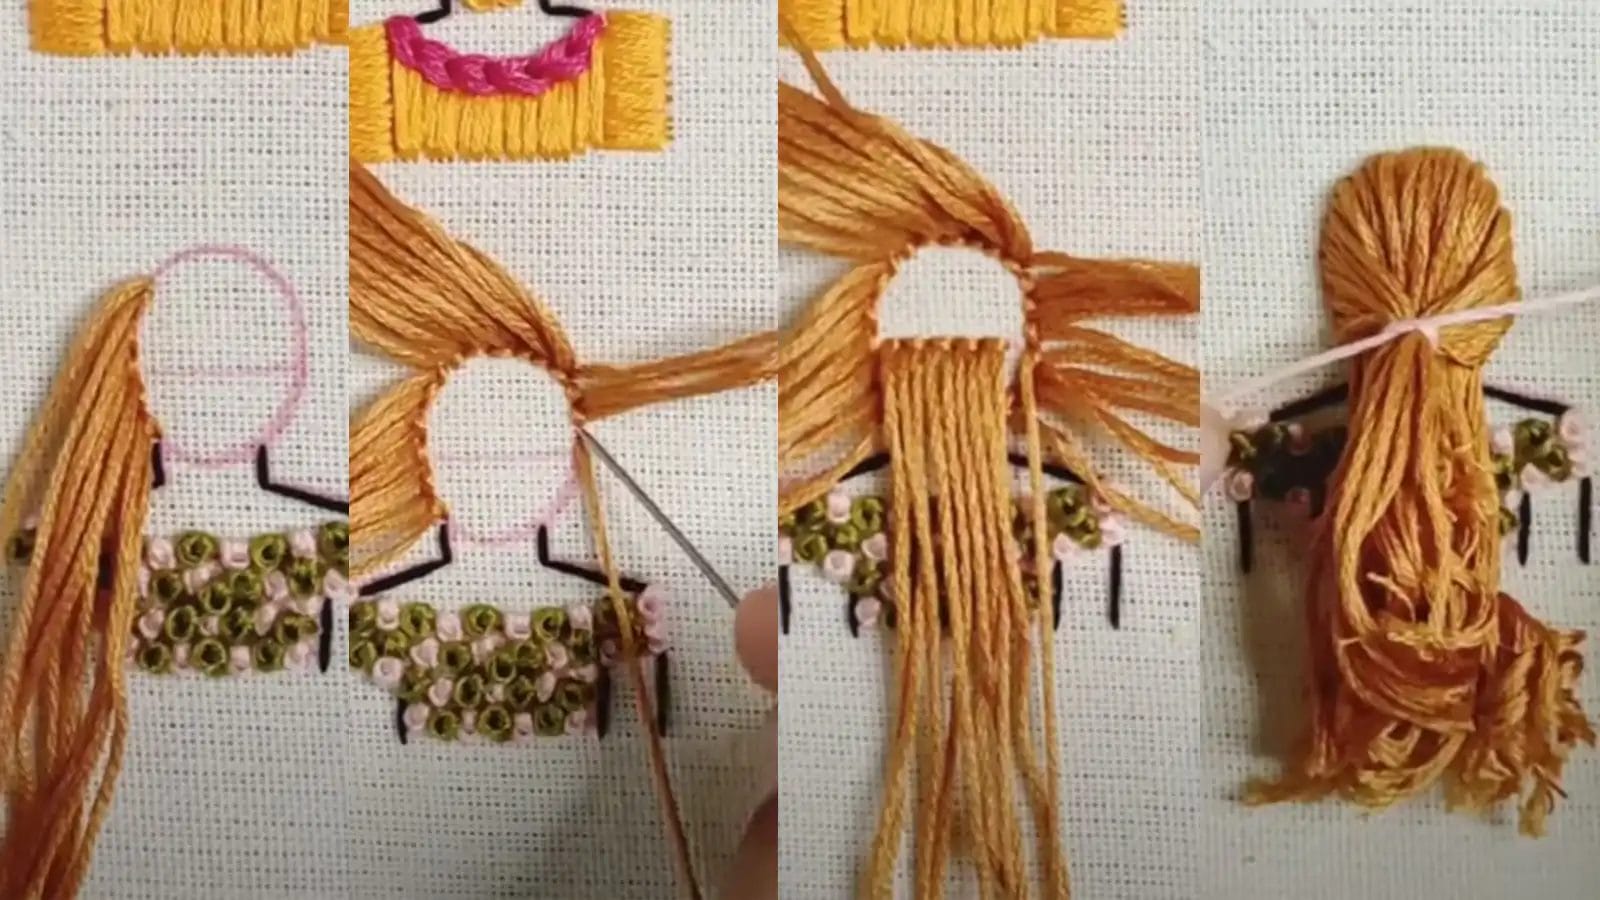
Step 7: Separate the Strands of Floss and Make these Floss Neatly Downward.
Separate the strands of embroidery floss to the desired thickness for your hair embroidery project. Grasp a single strand gently and pull it away from the rest, ensuring it doesn’t tangle. This technique, although time-consuming, prevents snags during the embroidery process.
Arrange these strands neatly in a downward direction after separating them. This isn’t just about looking organized – it’s a vital step for smooth stitching. Consider using a floss organizer to keep the strands in check. By maintaining this downward orientation, you’ll avoid a muddled mess that could hamper your progress.
Working with neat, separated strands is key for precision and detail in your embroidery work. Master this step, and you’re on your way to achieving a professional-looking hair embroidery finish.
Step 8: Make the Hairstyle you Like
Having arranged your strands of floss neatly, you’re ready to integrate this unique embroidered detail into your hairstyle of choice. You can make a braid or ponytail; let your creativity guide you.
This embroidered hair can be a focal point of your everyday look or the highlight of a special occasion. Remember, the length and thickness of your hair can enhance these details.
Don’t forget to add accessories! Clips, pins, or headbands aren’t only functional but can complement your embroidered hair, completing your overall style. It’s your time to create a hairstyle that truly showcases your personalized embroidery.
Step 9: Trim the Embroidered Hair
To make your embroidered hair look neat, use sharp scissors to trim away any extra floss. Hold the scissors near the hair roots and cut the hair smoothly for a natural, seamless look. Make sure not to nick any hair strands while trimming the embroidered sections. This requires a steady hand and focused attention.
Regularly check your embroidered hair for any loose or frayed stitches that may need trimming. This not only maintains the hair’s appearance but also extends the longevity of your embroidery work. Remember, patience is key. Trim gradually to ensure precision and avoid any potential mistakes.
With careful trimming, your embroidered hair will maintain its intricate beauty and style.
Conclusion
Congratulations! You’ve embarked on an exciting journey into hair embroidery, blending art and hairdressing to transform ordinary locks into extraordinary designs.
Remember, practice makes perfect. Experiment with different tools, floss, and stitches. Be gentle with the hair to avoid damage and maintain your artwork.
Take inspiration from both traditional and modern sources. With creativity and patience, you’re well on your way to revolutionizing your styling game.
The world of hair artistry awaits you. Enjoy the journey!