You’re about to breathe new life into that torn favorite dress or worn-out jeans. Embroidering over a hole is a clever way to not only mend the damage but also add a decorative touch. You’ll need a few simple tools, including an embroidery needle, thread, and hoop. With these in hand, you’re ready to start stitching your way to a repaired and revitalized garment. But before you begin, you’ll want to know the essential steps to ensure a seamless repair. How can you create a flawless satin stitch and secure your embroidery with a sturdy knot? I’m teaching you an easy and useful tutorial.
Key Takeaways
- Use an embroidery needle designed for hand embroidery, with a sharp point and larger eye for various threads.
- Choose high-quality embroidery thread that matches the garment color. Consider thread thickness and material for durability and texture.
- Secure the garment in an embroidery hoop to maintain even tension and prevent fabric distortion.
- Pass the needle through the fabric from the back. Stitch from one side to another using hand embroidery stitches to cover the hole.
- Make a knot at the back to secure the embroidery, ensuring a durable and long-lasting repair.
What You’ll Need to Embroider over a Hole in Clothes
To get started with embroidering over a hole, you’ll need a few essential tools.
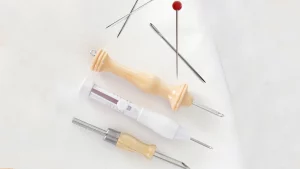
Embroidery Needle
When you’re ready to embroider over a hole in your clothes, you’ll need a specialized tool: an embroidery needle. This needle is designed with a sharp point and larger eye to accommodate thicker threads or embroidery floss.
Choosing the right embroidery needle size is crucial, as it depends on the type of fabric and thread you’re using. A larger needle is suitable for thicker fabrics, while a smaller one is better for delicate fabrics.
Embroidery Thread
Choose the right thread for your repair project. Embroidery floss is essential for embroidering over a hole in clothes, as it adds color and texture to the repair. Choose a high-quality thread that ensures the durability and longevity of the repair.
Embroidery Hoop
Before you start embroidering over a hole in your garment, having the right tools is important. An embroidery hoop is essential because it helps keep even tension and support.
This versatile tool is adjustable to fit different fabric sizes and shapes. By using an embroidery hoop, you’ll prevent fabric distortion and puckering, keeping your fabric tight for accurate stitching.
How to Mend and Repair Holes with Embroidery on Fabrics

You’re now ready to start mending that hole with embroidery! You’ll need to follow a few simple steps that will guide you through the process.
Step 1: Hoop your garment.
Secure your garment firmly in an embroidery hoop to create a stable surface for stitching over the hole. This crucial step ensures your fabric remains smooth and taut, making it easier to embroider over the hole.
As you hoop your garment, make sure the fabric is evenly tightened to prevent puckering. A hoop helps maintain fabric tension, allowing you to focus on stitching with precision.
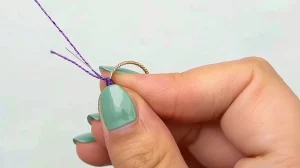
Step 2: Thread the needle.
With your garment securely hooped, you’re ready to thread your needle with the chosen embroidery floss. Choose a needle size suitable for your fabric, and select an embroidery floss color that complements the fabric.
Ensure you’re using a single strand of embroidery floss to thread your needle. If needed, use a needle threader to make threading easier. Double-check that the needle is securely threaded before proceeding.
Properly threading your needle is crucial for smooth stitching over the hole. Make sure the thread is knotted at the end to prevent it from coming loose while stitching. Take your time, and you’ll be ready to start embroidering over the hole in no time.
Step 3: From the back of the garment, pass the needle through the garment.
From the back of the garment, carefully pass the needle through the fabric. This step is crucial in maintaining the integrity of your embroidery design and preventing it from coming loose.
As you pass the needle through, make sure to keep the fabric taut to avoid puckering or distortion. With the needle securely in place, you’re ready to begin your embroidery stitches, covering the hole with confidence and precision.
Step 4: Stitch from one side of the hole to another with satin stitch until covering the hole.
Now you’ll start fixing the hole by stitching from one side to the other with satin stitches. This technique provides full coverage over the hole, ensuring a seamless repair. Make sure to keep your stitches close together to completely conceal the hole.
As you stitch, focus on creating a smooth and even surface over the repaired area. Use the satin stitch to cover the entire hole, working from one side to the other. Don’t worry if it takes a few rows – the end result will be worth it.
Step 5: Make a knot at the back of the garment.
Now you have filled the hole and finished your stitches. To secure the embroidery, make a knot at the back of the garment. This will prevent the stitches from unraveling.
To make a knot, simply wrap the thread around the base of the stitches a few times, then pull it tight to create a small knot. Make sure it’s positioned at the back of the fabric for a neat finish. A tight knot is essential to keep the embroidery intact, so don’t be afraid to pull it tight.
Conclusion
I’ve shared the approach to repairing the holes with embroidery. Now you’ve successfully mended that hole with embroidery ideas and inspirations! Your garment is now not only repaired but also embellished with a decorative touch.
From now on, that hole is a thing of the past, and your garment is good as new.


